Git Gud Gnoll Guide
If you ask the average Australian if they know the best DCSS combo to git gud and get your first win, you’ll probably hear a lot of “Gnar, mate.”
And they’d be right!
As a Gnoll Artificer worshiping the dark god Yredelemnul novice players can focus on learning the basics of resource management and threat assessment while minimizing the sometimes painful effects of the RNG.
Contents
|
How this works
A Gnoll’s natural skills scale in a way that provides a smooth early game with a plethora of options during the late game, but they can feel underpowered and RNG reliant during the mid game.
Yredelemnul absolutely (ahem) shines as one of the few gods that gives immediate benefits upon worship, with abilities that can carry through S-branches but can start feeling weak during the end game.
Rounding this out is the Artificer background which can be considered one of the easiest starts due to having two dozen panic buttons available right from the get go.
As a mid-armoured hybrid character, players will be casting level 4-5 spells by S-Branch, seeing mindelay around Vault, and even having L7 or 8 spells online to tackle Zot and the ascension.
Why this is beginner friendly
Some of the common complaints I see from new players is that shafting is unfair, winning is RNG dependent, and skilling can be difficult to learn.
By lighting Yredelemnul’s torch before stepping foot on any floor, players can stay safe in the knowledge that their dark god will prevent any malicious shafting, and Yredelemnul even provides powerful options to handle the pesky alarm and teleport malevolence as well.
A Gnoll’s natural adaptability and a hybrid play style greatly minimize the impact of needing “that one good thing” to drop… There are a lot of good things that a Gnoll can capitalize on. This adaptability comes with the benefit of not having to consider skill management, and a new player can focus more on how the skills’ growth impacts the available tools and meets given threats.
Another frequent complaint is around Attacks of Opportunity (AoO). The early evokables will offset the need to run away during the first few dungeon levels, and swapping with an ally will prevent the opportunity from occurring as well. Since you’ll usually have a revolving door of meat and spectral shields, disengaging from tough fights doesn’t need to cost consumables.
What you will learn with this build
In addition to learning the basics of resource economics, this build also helps players develop a feel for skill level and power scaling and encourages learning about new enemies.
It will help if you’ve adopted a growth mindset and approach this build as a practice; we’re not building a streaker, we’re building a solid foundation in a few key fundamentals of the game.
Resource Economy
The single most important mechanic to understand for consistent ascension is the economics of resources. Survivability in Crawl is not about steam rolling through every single encounter, it’s about having options available when the shit hits the fan… Everyone can burn popcorn.
Knowing the cheapest option to get out of any given situation is a skill that goes undeveloped in many people. Focusing on improving this one skill has put me solidly at 10% 30 day win rates across a broad range of character combinations.
To demonstrate, let’s consider resources through the lens of basic supply and demand. Some resources like HP and Piety that recharge over time or (in Yred’s case) by killing things can be considered high supply items whereas potions and scrolls generally have the least supply; furthermore, the more valuable potions and scrolls generally have lower drop rates.
On the other side of the equation is the value (or demand) of the resource. The value is going to be much more dependent on the specifics of a build and what gear/spells have been accumulated, so for the purposes of discussion we’ll only be focusing on a generic GnAr^Yred.
The final piece of the economy to consider is the cost. This is a pretty subjective thing, and some costs like HP/MP and piety are intertwined.
While you may end up with some spellcasting power, and outside of lucking into OTR+Ignite Poison or Ignition+Wiz+Int, this build lends itself to hybridization and as such MP has relatively low value. It can be cheaply used at the beginning of a fight, replenishes, and for the most part you’ll rarely run out of MP. The downsides to having 0 MP are you rely on all the other ways you have to kill things from whatever awesome weapon happened to drop, to javelins, or some evokables. Or just reposition and let your allies duke it out for a while. All that to say… for this build, MP doesn’t have much value. Since it’s so cheap and doesn’t have much value, it makes sense to spend it (save enough for your panic button!) in order to preserve higher value things.
Moving up the value chain we’ll see throwing items and our homies. These two actually hurt the value of each other since you can’t throw through your homies. And the homies are somewhat dependent on the monsters they’re created from. As a rule, derived undead scale pretty well with the enemies they’re created from, but you’re also more likely to face AoE or piercing fire attacks that clear out your crew quickly in later levels. If you’re able to find some darts early, they’ll go a long way towards saving much costlier items… things like kobolds with a venom dagger can cost valuable !curing or you can just hit them with a poison dart and kite them.
In the middle value tier for this build you’ll find things like piety, HP, evokers, and wands. Outside of HP, the real value of these things is very situation dependent, but seeing as how they’re all much cheaper than scrolls and potions, learning when to apply them will ensure you have the ?blink and !cancel on tap when you need it instead of wasting them when positioning (costs HP) and a lightning rod would have done the trick. HP is an interesting one because its value increases dramatically the closer you are to death (which includes one shots from an orb spider), but for the vast majority of the game it’s a relatively cheap resource that can protect other resources like allies which protect your more valuable resources like ?butterflies.
Finally, we have the real high value items that pull your ass out of the fire… scrolls and potions. While most items in this category are more medium value and fit into the situational paradigm of the previously considered resources, the high value ones are very high value. Things like ?blink, ?butterfly, !cancel, and !heal wounds should be protected and saved for situations where the only other option available is death.
The value and cost of items also change over the course of a game. Early on, ?poison is a great tool for crowd control, but as you progress through the game its efficacy falls off and the inventory space is better used elsewhere so you might as well spend them early. !Haste and ?blink are most valuable during the orb run, and while it’s not generally a good idea to specifically save items for the run, practicing good resource discipline should ensure you have at least a few on hand to get you to the next staircase.
| Type | Supply | Demand/Value | Cost | Renewable |
|---|---|---|---|---|
| MP | High | Low | low | Yes |
| Throwing | Med | Low[3] | low | No |
| God Allies | High | Low-Med | low | Yes |
| Piety[1] | High | Medium | low-med | Yes |
| HP | High | Medium | low-med | Yes |
| Evokers | Med[2] | Medium | low-med | Yes |
| Wands | Med | Med | med | No |
| Potion | Low | Med-High | high | No |
| Scrolls | Low | Med-High | high | No |
- [1] - God dependent
- [2] - Evokers have a variability based on evocations skill.
- [3] - Throwing weapons are Med value like wands usually, but this build has too many allies
Skills and Power Scaling
The skill system can sometimes be a bit daunting to new players, and while there is an automatic training option no one recommends using it. A Gnoll’s innate distributed training can offset this by helping new players get a subjective feel for what skill levels are needed for specific items or gear.
The primary things to look at from the start are min-delay, total defense (total D), and spell success.
From the very start, players should seek out daggers and short swords for an immediate 1.0 swing. Outside of a few special artefacts or a heavy spear, at no time should you be swinging slower than 1.0 on this build. Primarily you should be seeking one handed weapons, and since they’re all skilling at the same time you can get a good feel for how each weapon type handles. This might not always be an available comparison in an individual game, but over the course of multiple games you will have a feel for the comparative strengths of each weapon type at any given point in the game. I personally go with short blades and polearms as a default for this build, but I’ll just as often use some phenomenal randart mace or stave because that’s just how the RNG played out that run.
As you progress through the branches, you’ll find that it’s easy to adapt your gear set to the individual threats of each branch. You have a lot of freedom within the mid-weight body armours to tradeoff total D for branch necessary resists. You don’t have to worry about the sunk cost of a high armour investment when you have to throw on a leather armour to get rPois in Spider, and you don’t have to worry about the buyers remorse of getting your scimitar to mindelay when Rift is right around the corner.
Over time and with experience using different builds, a more refined and quantitative understanding of the skill system will unravel itself. But that’s a fire hose from which new players can be spared.
Learning About Enemies
One of Dungeon Crawl’s greatest strengths and successes as a game has been the in game documentation. This is another area of the game that can feel daunting to new players, with every new enemy needing to be inspected or you risk a quick trip back to the ‘Play Now!’ screen.
Yred’s Bind Soul ability encourages players to inspect enemies in a more natural and engaging way. We can replace the worry of “how will this mob kill me?” with the anticipation of “what cool shit can this guy do for me?” If we happen to notice that this particular mob has an unexpected resist or special attack it’s just a bonus.
As with everything else in this guide, this is all a learning process. Most enemies will only need to be inspected the first or second time you meet them… unless you play trunk in which case it behooves you to stay current on changes.txt.
And since the Gnoll’s skill distribution means you’ll be at a similar relative power each time you encounter this particular foe, you’ll also get a better feel for how various gear or spell choices can impact your encounter with that mob.
Resource Discipline
I’d like to call out some of the finer details of resource economics that pertain specifically to this build and how it will help develop an understanding of these tradeoffs for new players.
Right from the start of the game, we’re given a set of powerful but limited resources. The initial wand set should be sufficient for any top tier player to find a god or otherwise get to a point where they can confidently win the game. You’ll practice resource discipline in the first few dungeon levels using those three wands and your HP bar.
The majority of early fights against things like goblins, quokka, and kobolds are usually winnable with a dagger or short sword but a lousy RNG can throw you to the wolves. For these popcorny type fights, once you’ve pulled them singled out or at most two in a corridor, tab them down until you hit 50% HP. Once you hit 50% HP hit them with your wand of flame; you have 15 shots, this should be enough to clear through D:2 even with a lousy RNG.
The wand of charming is used on popcorn packs like gnolls and orcs… find one that is the biggest threat and have them beat on their friends. Of course, you don’t have a piety cost so time is free right now and solo pulling will preserve the charm charges for later (but maybe costing you a flame charge). You can extend the life of a charmed ally by trading a little HP, and while this isn’t without risk you get a stab bonus to help finish off your temporary buddy.
The wand of ice blast is your first shit hit the fan button, and you get to use it 5 times. Save them for difficult orc priest packs and uniques. Ideally, you’d spend this out just enough so it’s exhausted around the time your Hurl Torchlight ability is coming online.
These three basic items are enough to get top tier players to Temple in all but the harshest seeds, but you should have found other resources by the time you’re hitting D:4.
As soon as you’ve hit D:4, you’re going to identify ALL your scrolls. This may seem counter to having good resource discipline and it’s not a practice that should be blindly followed on every character, but I personally do for the most part. The primary reason for this is that the faster we begin worshiping Yred, the sooner we have the tools to finish Lair and Orc. Secondly, anything not identified is unusable to you anyways and since Yred carries Lair and Orc, the potential short term benefits of getting us to Yred outweigh the long term cost of having one less ?blink for example. If you did find some shops along the way, it can be worth it to spend a little on identifying potions and scrolls; primarily: ?identify itself, the low supply (?blink), or the detrimental (!mutation).
Once we get to Temple, the next phase of resource management comes into play.
You’ll immediately have access to a revolving door of meat armour. Just like with your starting wands, you’ll be balancing that meat armour with HP. The same 50% HP mark is usually a good measure for when to disengage and let a homie take a hit, but otherwise you should be tanking most fights and building a reserve of homies.
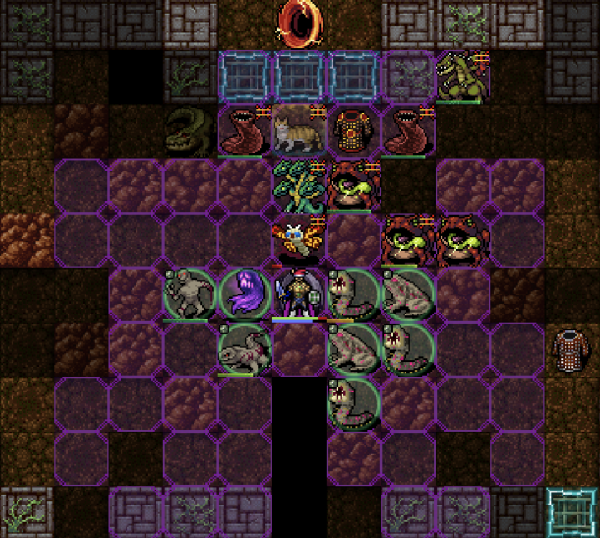
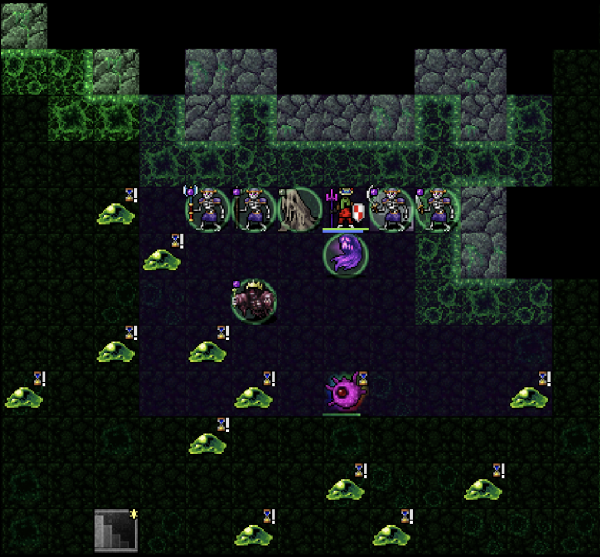
Don’t underestimate the impact of recalling your entire force around an enemy or smack dab in the middle of a pack, outside of axe wielders and some high threat denizens of Lair your homies can give as good as they get until you finish out S-Branches. Unless you land a really late Yred altar, you’ll also be getting a fresh pack of homies at the start of every level well before you enter Lair. These are to be spent on getting together an initial pack of homies.
Soon after worshiping Yred, you’ll be granted the Hurl Torchlight ability. What’s nice about this as a tool for learning resource discipline is that you get a specific amount every level, and since Invocations scale pretty well on Gnolls by always trying to keep one torch charge in reserve you’ll have a good way to reset a fight gone bad. This is a good time to exercise some of those medium value resources. Your resource pool should be devoted to getting you to the end of Orc without having spent ?blink or ?heal wounds. If the choice is ?blink or death, obviously you’re gonna blink, but otherwise try to preserve these two for later. As long as you have 2 !curing in reserve to cure poison, they’re a better healing potion earlier when you have less life.
Upon access to the Orc shops, your basic resource training is complete. It’s still prudent to follow these basic rules for the remainder of a three rune game, but how valuable things are becomes much more RNG dependent beyond this. Staying mindful about resource discipline and shooting to hold a torch charge in reserve will help make this skill become second nature.
What we won’t be learning
The core of this build is around the Gnoll’s innate adaptability coupled with Yred’s simplicity and 3-rune carrying power, and there are a few skill sets that won’t be exercised within the bounds of this guide. Due to the high downsides for under skilled shapeshifting, armour will almost always be preferable to any talismans you’ve come across. Most of your spell casting is going to be support spells or dealing with a SHTF situation, and the ally based nature of Yred doesn’t lend itself to blaster caster play styles. There’s also not much room for exploring the timed portals since they compromise our shaft protection.
This isn’t a build conducive to mindless tabbing either, but it can sometimes get to that point if the RNG lines up. Finally, outside of branch endings and the occasional branch entry, we aren’t going to have any opportunities to hone your stair dancing.
Yredelemnul
Thanks to the recent overhaul, Yred has been thrust into the top tier realm of game winning gods alongside Fedhas and Nemelex but with a much more forgiving play style. Unlike most gods, Yred’s bounty starts immediately upon worship and access to higher abilities is quickly granted over the next few dungeon levels. Yred is fully capable of carrying through S-branches and is able to maintain some clout through the remainder of a standard game.
Homies
Allies are one of the most powerful tools in the DCSS arsenal.
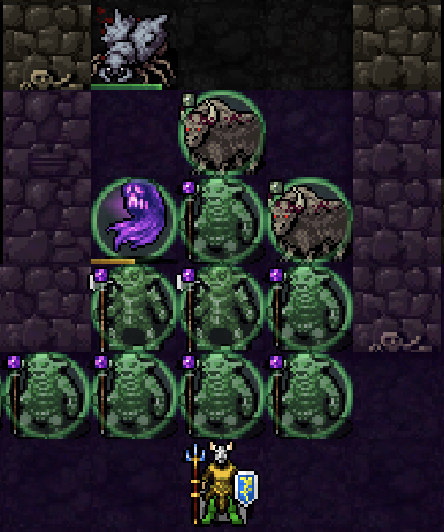
Properly applied, they can increase your effective HP pool, overwhelm defenses, or block LoS effects. But for most characters, maintaining your ally pool is tedious. Either you’re juggling Animate Dead and Death Channel or summoning/forging the same friends every fight.. I’ve always found the play style boring. But with Yred, we get our homies for free. They just show up for us without having to lift a finger, and the cool part about derived undead allies is that they natively scale with the branch they’re from. Even the weakest zombie will prevent an attack of opportunity if you swap with them, but overall zombies are fairly tanky.
Most fights you should still be able to isolate and solo an enemy, so you have ample opportunity to build up a deep bank account of homies to call to help out in bigger fights. This doesn’t mean you need a 1 tile corridor for every fight; 2 tile corridors are better for this build in most situations so your homies have room to move.
What you want to do is engage the enemies in a way that you’re trading the top 50% of your HP to preserve and attempt to grow your pack of homies. This means taking care around the axe wielder or bolt caster… Most of the bigger AoE effects are on uniques that are supposed to cost more to beat anyways. Early on, most of the axe wielders you’ll be fighting are members of a pack, so it’s worth using those charm charges to have them turn that deadly weapon against their brethren. If it survives, you can surround it then get a stab and some free hits in from all your homies to minimize the damage they send your way. Or just move them to a 1 tile and tank them down.
Bolts are a little trickier to mitigate since they’ll usually be hitting the homies who are following you into the fray. I like to get in close and recall my horde around them, quickly negating their multi hit bolt capabilities while likely overwhelming their pitiful caster defenses.
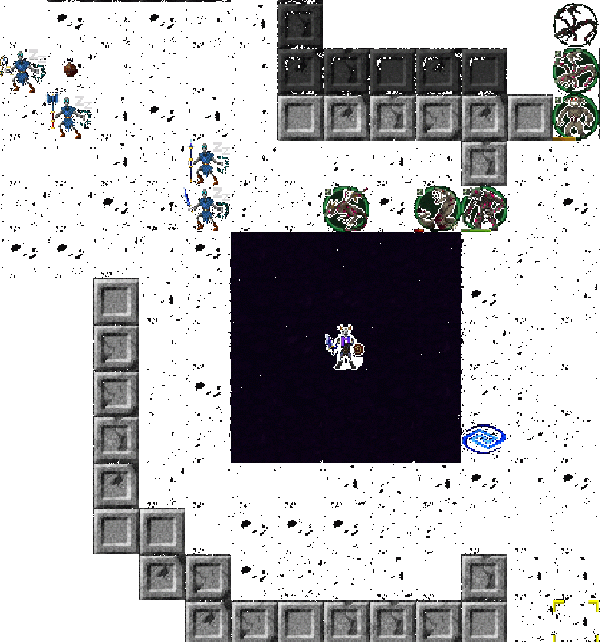
One important part of the ally mechanic to keep in mind is that allies (in general) won’t hit anything you don’t have unblocked LoS on. This means not only monsters off screen, but also those on the other side of a glass wall have the ability to hurt your homies without your homies being able to retaliate. For summoner and forgewright builds, this usually happens during fights where you’re largely aware of the threats, but the semi-permanent nature of derived undead means you’ll lose some friends during your normal exploration as well.
It’s important to keep an eye on the message bar to see if anything unseen is harming your homies. Clearing particularly dense levels like Vault:5 you’ll actually find you need to do a lot of backtracking to ensure the tail end of your homie train isn’t getting picked off by some baddie that joined the party late.
Recall Homies
The bread and butter Yred ability. This gets quivered and used in almost every single fight. I can not stress enough how effective this ability is, there’s a reason recall is no longer accessible to players outside god abilities. And it costs 0 piety!
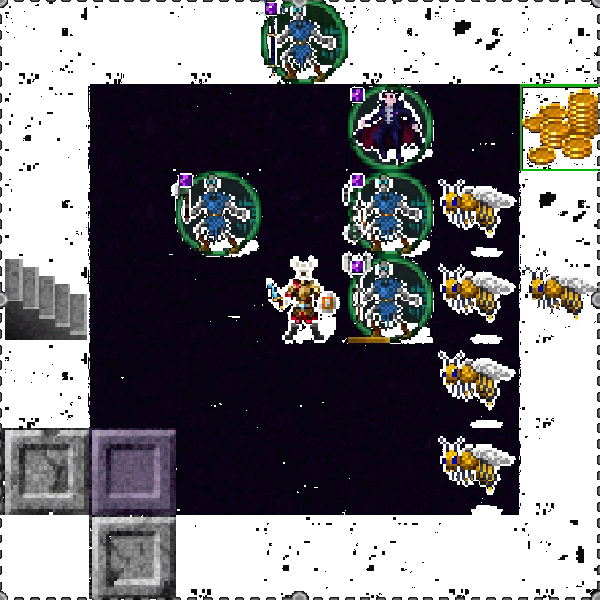
For most of the game, your pack of homies is going to trail behind you and get spread out. This works fine since it keeps them out of harm’s way, but it also presents the problem of how to effectively use them when the fight happens. Recall Undead Horde solves this problem for a mere 2 MP. Imagine you’re standing face to face with an early Natasha, you bloodied her nose a little and you’re feeling like this fight is going your way when suddenly she spawns a few imps around you that all begin pounding on you with relish. This is what you get to do to your enemies. One second they’re fighting a giant armoured rat, the next they’re completely surrounded by shambling corpses that all take a swing.
Recall is also useful for repositioning the battlefield during large fights. As enemies invariably stream in from different directions, your concentration of homies and where you lend your support will change, often leaving a buildup of homies on the wrong side of the screen or taking shots from even more enemies further off screen. This applies doubly for valuable bound souls that might need a break from the fight. Recall should be one of the first options you consider during a large fight when you take your hands off the keyboard and think “what’s my next move?”. With practice, you’ll get a good feel for how the homies will be repositioned by a recall and when it’s the best bang for the buck action in your arsenal.
Lighting the Torch
There is a bit of an art to optimizing Lighting the Black Torch, but we’re playing it safe and ensuring we avoid shafts by following a few simple rules.
If you’re entering a new branch, you’re going to immediately light your torch the second there are a couple open spaces around you. Establishing an initial foothold in a new branch may cost you some resources, but you don’t have to worry about getting shafted so we can be a little proactive in their application. Most branch entries are cheaper resource wise than getting shafted, so we’re also practicing strong resource discipline this way as well.
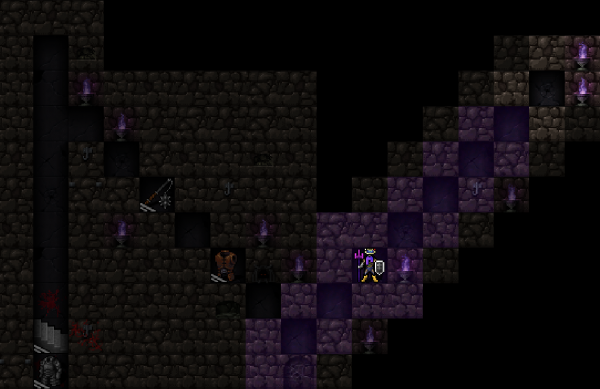
Outside of the one stair branch entries, you’ll want to scout all three stairs and decide which is best based on available space for the initial homies and the potential derived undead they’ll be able to help you create. Your stealth should be reasonably high, so you can expect most monsters to stay sleeping when you do your peeking. Even if there aren’t any enemies visible on a staircase it’s always worth it to light your torch before moving off the stairs to ensure you don’t get shafted.
You can get away with not immediately lighting the torch in a few instances:
- the bottom floor of any branch - save it for when you’re ready to break a vault, get teleported, or otherwise find a strong fight.
- the second to last floor of any rune branch - you can’t be shafted into the final level of a rune branch, still use it soon as you find enemies.
- timed portals - save it for when you need it or the final vault fight.
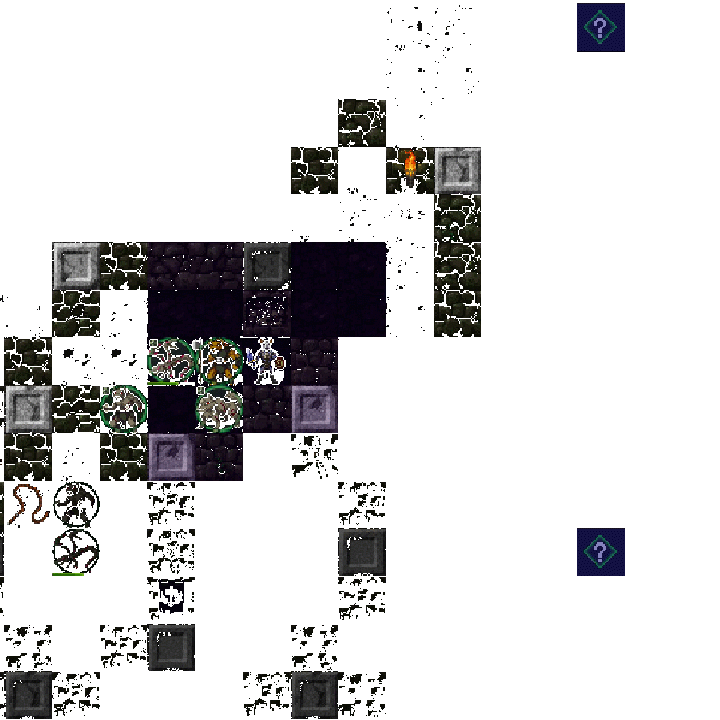
Once you’ve lit the torch, we’re going to establish a bastion by clearing the space between the three upstairs that you previously scouted. If you do this carefully and with an attitude towards building your horde, you’ll be able to o+tab the rest of the floor most times. Practice using your stealth to avoid strong fights until the bastion and your pack are established. This will also give you a safe space to retreat to and regroup your homies if a fight starts to go south.
After the level is clear, you might be left with the choice of clearing a vault or two. You should carefully weigh the potential costs of clearing out any given vault, and you need to have a way to deal with the ghost since Yred won’t help you there. Dispel Undead should be memorized as soon as it’s available and under 20% but it’s not always going to be available.
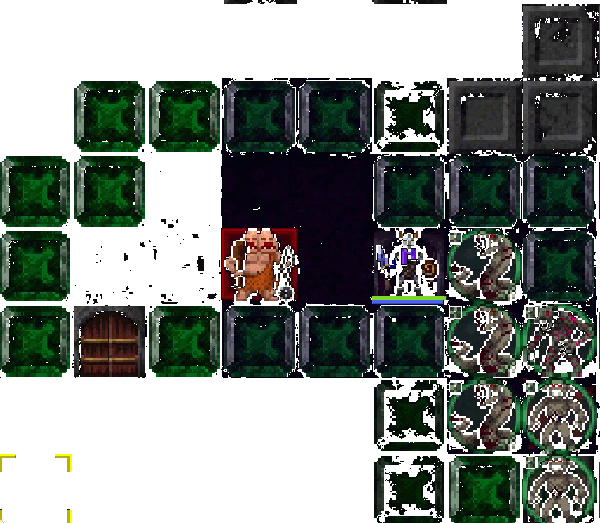
Door ghost vaults you can usually sacrifice some homies while you run away, then engage the vault residents one by one. Teleport ghost vaults can be death traps, I recommend avoiding them unless you’ve carefully assessed the threat level; this is not a place to take a gamble. You can still come back to them when you’re strong enough to handle them solo, so don’t let the FOMO get you. Finally, avoid any vaults that can potentially send you to the Abyss, Yred won’t do much for you and we want to avoid it at all costs.
Living Without Stairs
One of the disadvantages to our Dark God is their predilection for fully cleared levels. In most cases, this means we’re going to be without the safety net of stair dancing… Fear not, this is a feature, not a bug.
At 2.5 total turns, stair dancing is not without its risks. For most characters that aren’t beefy like a MiBe, stair dancing should be performed only when there’s a safe distance between you and a major threat. That isn’t to say we shouldn’t still stand on a staircase in the event we need to escape upstairs, but this should happen once or maybe twice per game at the most.
Luckily for us, Yred and the Dungeon provide a few fantastic tools to turn this weakness into a strength. Scrolls of ?teleportation are one of the most abundant consumables in almost every game, and many characters end up with over a dozen sitting unused in their inventory due to the fear of being left in the lurch. Yred’s Recall Homies alleviates this concern and makes it fairly safe to teleport multiple times in a row if necessary. Our strategy of peeking staircases and building a cleared bastion reduces the chances we’ll end up surrounded by a new pack of baddies.
Teleport does take a few turns to trigger, so learning to read your ?teleport early is a skill we should be focused on here. With Yred giving us some safety, we have a much better margin for error if we do end up in a situation worse than we started in; however, it’s also likely the new situation can be addressed with something the previous one might not have like a Shackle after you’ve just run from a huge undead pack. In addition to running away from a fight likely to end in death, using a ?teleport to break up a nasty pack can save on more costly consumables like ?blink and !heal wounds.
Don’t forget that you can always cancel the teleport status by reading another ?teleport if the situation changes and your situation is no longer as dire as you’d originally feared. One ?teleport is a small price to pay in most runs.
Hurl Torch
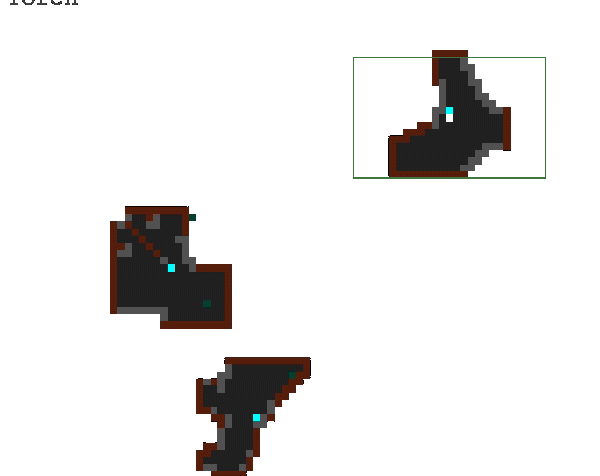
Hurl Torchlight is a fun mechanic that will help you learn AoE and beam pathing mechanics. The torch blast has the unique property of both buffing your derived undead while simultaneously hurting enemy living, holy, and demonic enemies caught in its blast. Since it also has no effect on you, it’s safe to cast while you’re standing right behind a rank of your homies holding back an onslaught of mobs; this is a targeting mechanic you can abuse with Mephitic Cloud and rPois so get comfortable with it. You don’t always have to use this on an enemy either; drop this on your hydra zombie and laugh at the mobs being slaughtered.
Gnolls naturally have a higher invocations aptitude, and you’ll find this allows torch damage to scale nicely through the game. Even in Zot:5, you’ll see meaningful reductions in the enemy’s HP bars.
Torch charges will also be a focal point for managing your consumables. Try to budget a torch charge for your initial level entry and try to have one saved at the end of each level. The rest of the torch charges should be spent throughout the level with an eye towards preserving your homies, so let loose on that axe wielding warlord or flaming piglet. You can also freely use a torch charge against uniques, since Yred gifts you an additional charge for each unique you kill. Don’t save a final torch charge at the expense of costly resources, but maybe try using ?poison instead of that torch charge or quaffing one of the eight !rage taking up space in your inventory to eliminate an axe wielder before he decimates your homies.
Suck Life
Yredelemnul’s capstone power is a major life saver that stays relevant throughout a standard run. It isn’t too piety intensive, so if you need to fire off a second Fathomless Shackles as soon as the first expires you won’t be leaving yourself out of options.
Most of the time, leaning on the kill buttons while you have your first Shackles going is enough to finish off the majority of large fights. Don’t expect the life draining effect to fully counteract the incoming damage you might be receiving, so you do want to kill threats as quickly as possible even if they’re giving you a little HP each turn. If you’re finding you need to lean on this so much that your piety keeps dropping too much to keep it on speed dial, you should probably take some time and reevaluate your build… maybe there are some spells, a weapon, or gear rearrangements that you can make to increase your general survivability. Paying attention to your positioning can help increase the number of enemies caught as the area of effect shrinks over time.
Fathomless Shackles should come online by the time you’re finishing Lair, and probably the first place you can plan to use it offensively is in the Orc:2 vault. It may come in handy prior, but combining !attraction and a Shackle will quickly wipe out the main orc pack. If you draw the ranged/centaur vault this tactic is still valid since the blink spam will block LoS and they’ll end up close very quickly. !Attraction is an underutilized consumable that can be leveraged in very unique ways for quite a few different builds in the future.
For most of the standard game, you’re going to have something in range that you’ll be able to regenerate life from, but the hold ability is still immensely useful for situations where you need to retreat from an area. Don’t forget to recall your homies so they aren’t slaughtered off screen. You also want to be very careful relying on this in Elf and Vaults when the elven necromancers are around. They’ll ensure all the bad guys you just killed come back as enemy undead which you won’t be able to drain; this is much more manageable in Elf:3 than Vault:5 because you can better control the flow of enemies joining the fray. Unless you’ve lucked into some really strong gear or spells backed up by wizardry, I recommend avoiding Vault:5 on this build.
Having enough piety and MP on hand to always have Fathomless Shackles available is another critical target for practicing our resource discipline. It’s a powerful panic button that can help reduce the consumable cost of the teleport and alarm malevolence that Yred doesn’t directly protect you against. Combined with the ability to cheaply recall your flock of homies from across the map, and you shouldn’t have to worry about that pesky RNG outright ruining your run.
Soul Binding
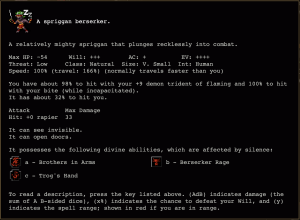
Bind Soul is by far the funnest ability in the game (Heavenly Storm being a close second). The possibilities for shenanigans are endless, and you can find some very fun synergies throughout your adventures. Almost any enemy that you might consider a significant threat will be worthy of binding, and outside of some general recommendations for basic monster types to consider in each branch I’m leaving it up to players to explore these options themselves.
As a practice, there a few types of monsters that don’t work to well or even anti-synergize with Yred:
- Things that leave clouds (e.g. catoblepas)
- Efreet and Azrael don’t leave their flame trails in spectral form.
- Monsters that rely on AoE attacks
- Xak’krixis’ prisms don’t hurt your homies, but the ignited poison still creates damaging flame clouds.
- Monsters that rely on direct LoS Ranged attacks
I say as a practice instead of rules because something like a centaur warrior with a bad ass bow and a halberd can still be extremely effective over the course of a few fights. Consider what other options the monster has available, they won’t outright hurt your other homies but they will at best stand around doing nothing a lot.
Playing the Game
Growing up with Nintendo Power, I can reminisce nostalgically over the guides of yesteryear that could be prescriptive and full of easter eggs. By its nature, Crawl doesn’t lend itself to this sort of guide, but because of a few almost guaranteed drops we can get fairly prescriptive for the first few crucial levels. Beyond that, the vagaries of the RNG will almost certainly provide some opportunity to grow your character.
Early Combat
The Artificer background starts with everything you need to get down to D:4. While it’s possible that a Yred altar might spawn early, we’re going to budget our early consumable with the expectation that it spawns in Temple between D:4 and D:7.
You’ll quickly have a few points in stealth, so a critical part of saving your early resources is to avoid out of depth and unique monsters. The dungeon info screen will automatically be annotated with any monsters you exclude from the inspection screen to revisit or bind later.
You can expect to fight the same general set of monsters on every run, so you can quickly learn how to deal with each as they come. Beyond the first few levels, I’m not going to provide any specific tactics since there will be multiple options depending on how your run is going.
Through D:1 and D:2, for almost any solo enemy you should try to melee it down until you hit 50% HP then hit it with a flame wand if you need to finish it off. Your wand of charming will come in handy to help deal with packs, and your ice blast is a panic button that deals enough practically irresistible damage to counter any unique or OoD monster you might come across. Sometimes, the most prudent method of dealing with an otherwise unkillable enemy is to charm them then leave them parked on an already cleared level.
To help through the early game hurdle, here are a few other specific counters you can use. Most of the time you’ll only need to worry about using a consumable the first two or three times you encounter any given mob or pack, then you’ll probably be strong enough to handle them in other ways.:
- Electrocution & Distortion branded enemies
- Flame or Iceblast before they get in range
- Worms
- Charm for a stab, flame if you’re netted
- Adders, Red Slime
- Lead with a flame, leave a corner shot available for ice blast if you’re about to die
- Heavily Armoured enemies
- Ice blast or charm that early orc warrior in plate mail, poison and curare darts are great if they’re available
- Ogres
- Don’t let them stand next to you, soften them up with flame or darts and kill them off with an ice blast.
- Gnolls
-
- Solo
- Flame if they have a halberd; otherwise, melee
- Packs
- Charm a polearm or axe user
- Ufetebus
- Flame or charm one, don’t let them surround you
- Scorpions
- Lead with flame or a poison dart.
- Ice Beasts
- Lead with flame.
- Black Bear
- Poison if possible, finish off with flame or ice blast if it berserks.
- Orcs
-
- Regular, Solo or Pack
- Check weapons, corridor fight. Charm if they have polearms
- Wizard, Solo
- Flame. Can melee after D:4ish
- Priest, Solo
- Break LOS, draw & melee. Flame if 50% HP
- Wizard OR Priest, in Pack
- Charm wizard/priest or an axe wielder, or ice blast wizard/priest
- Multiple Wizards and/or Priests
- Retreat and attempt to peel. Ice blast with priority on priests and multiple targets if forced to fight.
- Steam Dragons
- Ice blast
- Unseen Horrors
- Ice blast, or try to pin them between you and a homie/wall and smack them with something heavy. Sometimes ?teleporting away is the best option.
- Marrowcuda
- Fight in a one corridor hallway.
- Dowan & Duvessa
- Charm Dowan and tank Duvessa. Don't let Dowan die first or Duvessa will chew you to shreds.
- Sigmund
- Ice blast
- Grinder
- Flame or charm if he's around other enemies.
- Menkaure
- Lead with flame
- Ijyb
- Use the same wand she has or flame/iceblast depending on the threat of the wand. Charm her if there is a pack around that can kill her for you.
- Robin
- Charm or ice blast Robin, the try to split the pack. Be wary if you see 3 or more (hob)goblins in a group in early D.
Early Gear
It’s cool that our background gives us the tools to get through the first few levels, but even in the worst RNG environments we can expect to find some other stuff that will help us on our journey.
Early Weapons
You’ll start out with a club, which is a generally sub par weapon.
Your first order of business should be to get yourself swinging at 1.0 or less; this means a dagger, short sword, or spear (1.0 about the time you finish D:1). One of these is almost guaranteed to drop on D:1, but if not then you’ll almost certainly find it by D:2. In lieu of one of these, anything with venom or protection brands will be helpful; otherwise, you might be spending a bit more flame charges than the average run. Getting to 1.0 swing means enemies won’t be getting more attacks on you per action than you’re expecting - If the inspect menu says 2 attacks you can expect 2, not 3 because you’re swinging at 1.2 (with a club). Daggers and short blades can see you through to about the beginning of Lair except for a few high AC enemies like early orc warlords and armoured beetles.
As you find additional weapons in the dungeon, your primary focus should be keeping swing speed low. You can survive a 1.1 or 1.2 swing speed for a really nice artefact or highly branded weapon RNG was gracious to provide, but for long term survival and minimizing damage spikes the low swing speed is going to be better in most cases.
You should also come across a sling and some throwing items. Pick up and carry the first sling you see until you start hitting inventory space limits; it can sometimes prove immensely useful in certain water or lava heavy vaults and to soften up sleeping enemies at max range. Stones are useful for early pack splitting or pulling mobs from the edge of LoS, and darts should be used often in the early fights because your LoS will often be blocked later on when you’re worshiping Yred. Boomerangs and javelins can be ok to use here against ogres at the edge of the screen, but like slings be wary of their long throw speed and expect the enemy to move two spaces and also get an attack.
For my final gear load out I like to keep curare, silver javelins, and throwing nets on hand since they’re the best bang for the buck inventory wise. The rest should be spent early on to preserve more valuable resources.
Armour
Our starting armour kit is pretty straightforward. Assuming everything that drops is unbranded, ring mail is going to be giving your starting Gnoll the highest total D. The hits to casting and stealth aren’t horrible, so these secondary abilities won’t be hampered. These usually can be found on D:1 and almost never later than D:3, so if you don’t find one right away you can get away with leather or scale (especially if they have some enchantment or a good ego). You’re going to be staying in the mid-weight armours this entire run, so get comfortable in the 4-11 encumbrance rating range.
You’ll also want to pick up and start using a shield as soon as you find one. At the start, the bigger the shield the better since it dramatically increases your total D; however, you want to still keep your swing speed below 1.2 and ideally below 1.0. Large tower shields can make an already slow swinging weapon dangerously slow, and you won’t be able to effectively cast in them so expect to be using a buckler or kite shield for most of the game. If you do find an early tower shield, expect to downgrade around Lair or Orc in order to get some level 3 and 4 spells online.
Finally, an orb of light can serviceably fill your offhand slot until you begin worshiping Yred, but you won’t be able to capitalize on any of the benefits of the other orbs at this stage of the game. This build is around survivability, and while guile and mayhem are both insanely powerful in some gimmicky builds this isn’t one of those times.
Resists
For the first few dungeon levels, the only resists you should go out of your way to equip are rPois and Will. The former is critical because your low HP pool means even a single point of poison is going to knock off almost half your bar and two or more almost always require a !curing (which you may not have on hand making it very costly to quaff ID). Will is helpful to avoid being confused by the plethora of orc wizards throughout the early dungeon.
That doesn’t mean these are the only resists you should worry about though, and Gnoll’s skill sharing opens up a lot of practical swap possibilities that other characters might not have. As an example, staves of air are a fairly common early dungeon drop that provides a critical resist that is otherwise difficult to get. The naturally low swing speed of staves combined with a few points in staves, evocations, and air mean if you need to swap to it you’ll still be doing respectable damage.
If you find something with resists on it that is at all serviceable, hoard it. For now at least. As you find artefacts you’ll be able to reduce the burden of swappables to just a critical few. This even includes armour that might take a few turns to equip. A robe of cold resistance reduces more damage in an ice cave than an unbranded ring mail, and for certain enemies like Azrael your decent stealth scores mean you can retreat and swap into a tower shield of fire resistance for the one fight. Weapons and rings are generally going to be more practical, so ditch the extra armour as soon as you have faster swappables.
Resource Identification
As soon as you get to D:4 you can start identifying all your scrolls and potions.
Start by reading the scroll stacks from largest to smallest until you find ?identity which you’ll use on stacks of potions then single stacks of scrolls before (if you have enough) working back through the scrolls smallest to largest. Once you’ve found !mutation, just go ahead and quaff ID potion non-single stacks too.
Do this all on the bottom of the first clear (or cleared) D:4 staircase, so if you get a ?teleport go back up and if you get a ?summon you can take them to kill dudes. Otherwise, finish read IDing all the rest of your scrolls. If you found ?revelation, great! See if you can find the Temple. If you have a stack of them, just clear D:4 instead of trying to rush and go back, but check each new floor for Temple right away.
The resources you’ve just identified are now part of your resource bank account and are budgeted to getting you a god. If you have some left over after you find the altar that’s great, but Yred will soon provide you with all you need to clear the next two branches. Each time you descend to a new level just read ID everything.
Attributes
During the early dungeon, we’ll receive a few chances to increase our attributes. For this build, I generally put the first two choices (4 points total) into Dex, the next into Str, another into Int, then the rest based on how my character has progressed.
The Dex increases immediately help your early game survivability with some boosts to your stealth and some minor benefits in combat. Since we’re not extremely concerned with casting and our ring mail and kite shield’s encumbrance aren’t significantly reduced through skilling until after S-branches, we can wait to throw a couple points of Str in to help with the shield and armour penalties. Finally, the points in Int as we’re hitting S-Branches will give the L-4 and L-5 spells a bit of an extra kick in power. From there, you won’t go wrong with putting the rest of the points into Dex, but think through how your build has turned out and whether a few extra points in Str will help get you into an artefact chain mail or Int to bring Ignition or Summon Horrible Things online (probably only going to happen with wiz and some other lucky Int+).
Help! Yred didn’t spawn by D:7!
While the standard gods are all guaranteed to have an altar by D:10, our starting kit is likely to be exhausted if we haven’t found Yred in Temple or by D:7. In most runs, you’ll have picked up enough new resources to eek your way through the next few Dungeon levels until you find the altar, but D:8-10 can be quite challenging for inexperienced players without the benefit of godly powers.
Before proceeding to D:8, take some time to look over any gear you’ve missed. An otherwise unwanted heavy battleaxe might be just the swapper you’ll need to deal with an out of depth monster you were hoping to not have to see until you finished Orc. Ensure your scrolls and non-bare potion stacks have been identified, and check for any spells that might help you in the coming levels. You should be looking at L3 spells coming online soon which can help offset the missing deity, and darts will still be plenty effective against many of the enemies you’ll encounter.
Don’t hesitate to spend any and all resources you’ve gathered to get you to Yred’s altar. You’ll have a breather soon, once you start getting your free homies and then again when Hurl Torch comes online.
Equipping your Adventurer
With the early dungeon out of the way, we’re going to be a little less prescriptive. This is where the Gnoll’s natural adaptability really shines, and you’ll be able to flex the hybrid play style.
By the time you’re finishing Lair and Orc, you should have a decent cache of gear available to you and you’re likely hitting inventory space restrictions. Think through the value of each of the items, how it’s been useful or not in your current and previous runs, and start dropping stuff.
The first gear dump or two is probably going to be just a bunch of starting gear that you’ve upgraded out of, but after that the choices need to be a little more mindful. You can also use this as an opportunity to recognize lower value resources that you could get rid of by using instead of dropping on the ground; for example, you have the throwing and stealth to make atropa reasonably effective in mid game even if you aren’t a stabber - a blind enemy is going to still take more damage from your homies and hurt them less.
At the end of every level and branch, it’s a good habit to take stock of a few things.
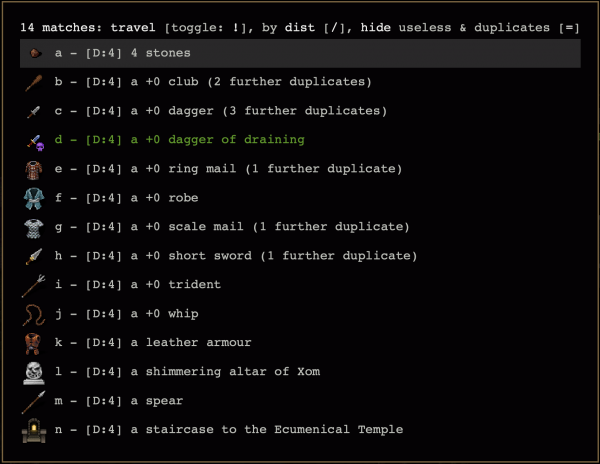
After each level, be sure to check what has dropped with Ctrl+F then search the current level with a period(.).
Until you’ve identified most things, you’ll also want to check your scrolls and potions for any unidentified stacks that you could identify either with a scroll or through use.
Branch transitions are a great time to check if you’ve gotten access to any new spells. Take note of anything in the late teens or early 20’s success wise as you can expect it to be coming online during the completion of the next branch.
Weapons
Around the time you’re hitting Lair, you’re going to find that you’re spending a lot of time trying to reposition around your homies in order to stay effective during a fight. The handful of smite targetable spells available to you at this point can help, but we want better ways to lay on the damage. The ideal weapon for this build is a trident or demon trident due to their innate reach ability. You can safely stand behind your homies and dish out damage. By Lair, you’ll also be swinging a trident at 1.0 or better, so unless you’ve lucked into an artefact weapon you can’t give up, pick up one of the unbranded tridents that have dropped along the way. Tridents have a relatively fast min-delay of 0.6 at 14 training, which is ideal for picking off low damage enemies thus freeing up your homies to use their hits to kill something else. The recent addition of partisans offers a slower swinging, heavier hitting one-hand alternative that will start reaching 1.0 swings about the time you’re hitting S-Branch.
Since you have the capability of swinging practically anything, it’s usually worth holding on to at least one axe and one flaming blade (this can be the same weapon). You’ll invariably find yourself surrounded or needing to face down a hydra, so having some extra consumable free options for these situations is a good investment. In the case of an axe, a !rage might help you effectively clear a pack and create enough homies to buffer the slow after effect. You can drop the flaming weapon after S-branches when you’re strong enough to solo a hydra regardless.
You don’t always have a choice of brand, but a few good ones on a (demon) trident for this build are freeze, drain, and vampire. For the majority of the game vampire will mean you can lean on the tab key and keep your piety topped off from not having to rest all the time, and drain is a great debuff that will help your homies kill faster and take less damage from drained enemies. Freeze is serviceable through most of the game, has a chance to slow certain enemies, and is the least resisted element on the biggest threats in Zot. You do need to be aware of undead heavy fights since Yred restricts you from using holy brands. I would generally advise staying away from the spectral and heavy brands on your primary weapon since both invite extra damage; both brands, along with partisans, can be invaluable on swappers to overcome a tough mob’s high defenses.
At the end of the day, any one-hand base weapon is serviceable but short blades and lower tier options might need to keep some !might or swappers on hand to deal with Orbs of Fire. That said, by the time you’re hitting Vault you’ll also have enough stealth to reliably sleep or hex stab enemies if the RNG has blessed you in that direction too.
Armour & Shields
In order to improve your survivability throughout the game, you can expect to be reconfiguring your gear set between most branches.
While this can somewhat depend on your reliance on spells, you can generally expect to be in leather, ring or scale mail, or swamp/fire/ice dragon armours. Generally you should be shooting for the highest total D while meeting the minimum resists needed for a given branch.
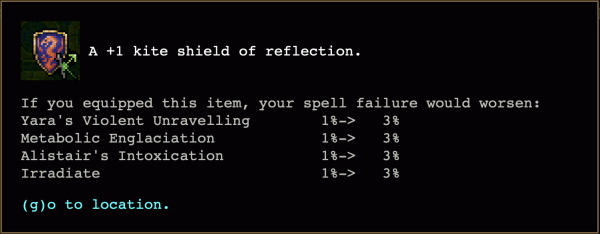
You might choose a buckler over a kite shield if you’re leaning on higher tier spells; otherwise, go with the largest shield you can that supports a 1.0 or less swing speed without reducing spell success below about 20%.
Spells are supplementary for us, and we’re considering MP to be fairly disposable so it’s ok if you’re whiffing a few more than would be comfortable on a blaster caster. Summons are the exception to this since the nameless horror can quickly suck your MP and leave you without a panic button; 10% or lower should be fine though.
Jewellery
Unless you’ve lucked into a good RNG and you’re steam rolling every level without needing much direct action from Yred, faith amulets should be preferred over everything else with regen a close second. Regen edges out faith on those characters that aren’t needing Yred’s support as much. There’s an argument for MP regen if RNG has heavily favored you in the casting department. Acrobat, and reflection also have some limited usefulness, but I’d steer clear of spirit shield after early dungeon.
Rings are likely to be swapped around pretty regularly until you find a couple artefacts that are too good to change out. When in doubt, both evasion and protection rings can be beneficial, and until you’re at Will+++ you’ll be moderately vulnerable (10-20%) to the hexes you’ll encounter which includes enemies with banishment.
Resists & Specials
While each branch has a general set of resists you’ll want to shoot for, there is a minimum set of resists that is usually “good enough” to not have to worry about swapping out except in edge cases: Will++, rF+, rC+, rPois, rElec, & SInv
Until you have a resist permanently or semi-permanently covered, the inventory space is always worth carrying an extra item.
Rings are ideal, but weapons are a close second since they’re all fast to swap. Armour, shields, and amulets should be traded for corresponding rings and weapons as soon as you’re reasonably able. You’ll have the stealth to withdraw and reset some fights, but you can’t always count on 10 turns unmolested to don a fight critical resist.
From the time you’re hitting S-Branches you can expect to encounter uniques as well as common mobs that are able to hit you with AC bypassing cold or spiky electric damage. The stacking effects of poison only get worse the deeper you go in the dungeon and being fully poisoned can take you from 1/2 a bar to 0 HP faster than you realize.
There aren’t many enemies in a standard game that are major threats with negative energy, so for the most part rN+ is a nice to have. Will+++ also falls into the nice but not required category for this build since we can generally expect to have homies available to recall and block LoS against hexes and banishment.
The cloak slot offers some interesting opportunities with the repulsion ego offsetting most of the resist needs prior to hitting Zot. Especially in Snake, Shoals, and Elf, repulsion is anecdotally just as effective as a single point in rC, rF, and rPois. You can’t blindly tab through the level, since damage can spike, but it’s a worthwhile option if the RNG has otherwise not come through for you. Invisibility also offers some unique opportunities, but resistance is generally going to be a better scarf. Avoid harm and shadows; the former being two much gamble and the latter invites off screen unanswered damage to your homies. The single resist cloaks you’re likely to find are also great candidates, but the overall AC benefit from the cloak slot isn’t major outside of some artefacts.
Evokables
A small set of rechargeable items. These are powerful panic buttons that should be used strategically to preserve more valuable resources. Our evocations skill scales almost as well as our invocations, so these remain powerful and functional through the entire 3 rune game and ascension. I’ve roughly ranked them and the following consumables lists from most to least valuable. Your mileage may vary a bit as your playstyle develops.
- Gell's gravitambourine
- Use this to preserve ?butterfly and ?blink. One of the best evokers in the game, and all characters should skill to ~9 evo for the larger targeting area.
- Box of beasts
- By mid-game beasts are stronger than any of your homies and most enemies or bound souls. They can be glass cannons, so mirror for maximum effect.
- Sack of spiders
- Spiders are weak to poison so it won’t synergize well if you rely on Olgreb’s Toxic Radiance or Mephitic Cloud, but the chance to web any monsters in sight can win most fights.
- Phantom mirror
- The mirror often spawns to the side or behind enemies instead of blocking their path to you. Use it on any strong mobs or bound souls. Pairs exceptionally with Box of Beasts.
- Phial of floods
- Situationally very strong, but water impacts your homies’ effectiveness and they’ll often block LoS.
- Lightning rod
- Use this as a rechargeable bolt attack, trying to use it across a pack usually nets you a homie or two by the third charge. It might be worth sacrificing them though.
- Tin of tremorstones
- Another SHTF, random AoE targeting will chew through your horde.
- Condenser vane
- Save it for SHTF, your homies do not synergize with the clouds.
Consumables
Making up the bulk of our resource economy are wands, thrown weapons, scrolls, and potions.
Wands
Outside of the initial three wands, Crawl has a number of wands that might drop. Since only one of the AoE and Hex wands (in addition to Bolt) are generated per run, Artificers are in the unique position that they could potentially have more wands than the average player. Rounding out the AoE set alongside our starting wand of Ice Blast are the wands of Roots and Warping. Charm alternates with paralysis, and you’ll eventually find any one of Quicksilver, Light, or Acid. Wands are a core component of our fully hybrid playstyle, and outside of keeping a couple 2-3 charges in reserve for emergencies you should be using them pretty liberally to defend your potions and scrolls.
- Quicksilver
- Debuff the enemy’s buffs. Removing invis lets your zombies target major threats like dread liches. Does not remove the ice form status.
- Roots
- Top tier for our gnoll, EV and movement reductions mean enemies die faster or let you make an escape. Almost as valuable as ?blink or ?butterfly.
- Light
- Blinds most enemies in the game, reducing combat effectiveness and setting you up for the less powerful forms of stab. Use liberally, but maintain one or two charges in reserve.
- Digging
- Make 2 or 3 tile wide corridors, clear pillars from rooms so your entire pack can hurt enemies, make a murder hole when SHTF, and save 4-5 charges for your orb run.
- Acid
- Does to AC what roots does to EV. Apply once to a high AC monster and take them to pound town.
- Charm
- Bad guys killing other bad guys never gets old. Use the same anti-pack tactics you learned from the start.
- Paralysis
- Great setup for sleep stabs, especially early game. Evo, Stealth, and Short Blades all scale well to keep this relevant through the whole game.
- Iceblast
- A solid AoE. Zombies have some cold resistance, so don’t worry too much about catching your homies in the blast.
- Warp
- Needs to be used earlier than roots and the AoE can hurt your homies. Use these for SHTF situations when (re)building your horde.
- Mindburst
- Most useful on high AC/EV enemies with low willpower or during the early game.
- Flame
- Largely falls off by midgame, but it can be good to break LoS in Shoals. Ditch it after S-Branches.
- Polymorph
- Extremely situational, but surprisingly effective against early and mid-game uniques. Ditch it after late Dungeon.
Thrown Weapons
Due to the permanent horde of shambling undead, our throwing skill won’t get a lot of use, but don’t underestimate another tool to save your potions and scrolls. The cumulative damage effects of the venomous darts can make a big impact on early Ogres or offset a Troll’s natural regen enough to chip them down. Outside of short blades, darts will be thrown much faster than anything you’re swinging until you’ve gotten a couple runes, so throwing a few directly in a tough monster’s face is also a valid tactic. Consider Atropoa or Datura oppose HD instead of willpower, so they can shut down some monsters that our wands and most spells have a hard time effecting. Since throwing and stealth both scale well, you can expect to see boomerangs hitting 1.0 around the end of Lair and mindelay about the time you’re clearing S-Branches; javelins will hit 1.0 about the time boomerangs hit mindelay and achieve mindelay of their own sometime during Vaults.
- Silver Javelin
- Use them early if you have to, but preserve through mid-game as they do boatloads in the end game.
- Throwing net
- Setup stabs, shut down cleavers, or just run away. They’re quite valuable but use them liberally.
- Curare
- Slows everything not resistant to poison. Great for kiting fat double ogres past your homies (or alone).
- Javelin
- Full screen bolt attack that does solid damage. Use these during early and mid-game to preserve silver javelins and bolt wands.
- Disjunction
- Much better than the dispersal they replace. Use these to keep smite targeters off screen for a few turns, break packs, or make a getaway.
- Atropa
- Aptitudes are just right to keep these relevant through a 3 rune, but homies largely prevent effective application during the mid game.
- Boomerang
- A thrower’s bread and butter. Unlikely to see much use once Yred is online, so use them early.
- Poison
- Great for pulling or adding some extra damage from a distance. You should find some early enough they can help you get to Yred.
- Datura
- Occasionally useful for shutting down a caster or breaking a non-intelligent pack from behind a closed door, but otherwise too risky.
- Stone
- Use these for early pulling, ditch them once you start hitting inventory exhaustion.
Scrolls
Whether it’s offense, defense, or long term buffs, scrolls come in a variety of flavors. We have two of the strongest SHTF tools in ?blink and ?butterfly alongside a number of offensive and utility options. Most of our scroll use should happen when cheaper options won’t get the job done, but we still don’t want to spend our valuable ?blink and !heal. All of the offensive scrolls will affect the entire visible screen, so carefully consider the impact to yourself and your horde when reading ?vulnerability and ?immolation.
- Blink
- The best get out of jail free card that isn’t provided by a God. You should try to save a couple of these for the orb run, and maintaining an adequate supply should be a cornerstone of resource discipline.
- Butterfly
- Second only to ?blink (and situationally better), synergizes well with our horde fighting in the open. Use these if you’re getting surrounded by a bunch of heavy hitters or LoS hexers.
- Fear
- Middling efficacy when used mid fight as your homies will often take the opportunity to smack a fleeing baddy and break the fear.
- Teleport
- Unlike other characters, Yred makes teleporting not only relatively safe but your only option for a major change of footing. Use them early and often when fights look like you might be overpowered; recall your pack immediately upon arrival.
- Summoning
- Scales with the branch you’re in and powerful when used early in a fight. Save these for SHTF situations where you’re losing your pack or to preserve an exceptional bound soul.
- Poison
- Synergizes perfectly with your pack. Use these frequently to control the fight or damage threats intent on closing the distance. Be careful if you’re reliant on Ignite Poison.
- Noise
- Use these to pull monster filled vaults out of tight halls or enclosed spaces, save 2-3 for pulling Zot lungs.
- Vulnerability
- Amplifies ?fear, /paralysis, and /charm, among many other will based hexes. Will not improve HD resistant effects like darts or Alistair’s Intoxication.
- Immolation
- Use with caution if you have a large pack, but ?immolation can let a lowly goblin zombie clear an entire room of orc warriors.
- Fog
- Only useful during SHTF when your pack is gone; otherwise, you’re only inviting damage your homies can’t respond to.
- Silence
- Locks you out of all your god powers and some panic buttons. Leave these for the more advanced players, there are plenty of ways to deal with the few threats you’d use these on.
Potions
Nothing but buffs and healing here. The former you want to spend early in a fight, so you don’t have to spend the latter later. With the replacement of !degeneration with !moonshine, the early emergency quaff-ID game can be more dangerous than before. Be sure to ID your potions early, even if that means quaff IDing stacks with more than one during safe times. I prefer to do this on the bottom of an up stair or right before I open a vault door, so I can benefit from any buffs I may have discovered or rest off anything undesirable.
- Haste
- Increases combat effectiveness and escape potential. Save one or two for the orb run, and use them in fights early to avoid a ?blink later.
- Heal Wounds
- Try to save these for mid to end game if you can, but don’t hesitate if a !curing is still going to leave you in the death zone before your next turn.
- Enlightenment
- A cornerstone in our Abyss avoidance game. If you’re not at Will+++, drink one whenever a monster with the Banish spell is on screen.
- Cancellation
- Reserve these for contamination effects, and try to avoid using them to clear Mark status as Yred should be capable of helping with that in most branches.
- Might
- Use early in fights against either high AC or high EV enemies or large groups that might chip you down enough to need a !heal wounds.
- Resistance
- Use them as needed against uniques, out of depth monsters, or major threats with elemental attacks you’re unresisted against.
- Curing
- Quaffing one at 40-50% can save on the more precious !heal wounds, but be sure to save a few to clear confusion and poison statuses.
- Magic
- Not needed until it’s needed. Always save one in case you need an emergency Shackle; otherwise, use them liberally to stay in longer fights.
- Ambrosia
- Only use this when you’re fully protected by homies in order to stay engaged in a long fight. Be prepared to spend a !curing if an enemy breaks through your defensive lines.
- Attraction
- Pair with a vampiric axe or Shackles to turn the marked status into a buff. Be wary of picking up too many enemy undead!
- Brilliance
- A significant force multiplier when you have mana intensive spells like Manifold Assault.
- Invisibility
- Not very useful out of the early game and branch entries since we’ll almost always have homies, but keeping a couple on hand for invis stab bonus against major threats can pay off.
- Berserk Rage
- Save these for Orbs of Fire in Zot, but only after you’ve prepared the fight. A !cancellation can remove the slow effect if necessary.
- Lignification
- Can be strong early due to poison immunity and high AC, but falls off in a 3 rune game. Can pair with a couple scrolls of ?Torment and ?Immolation to wreck The Royal Jelly.
Spells
While we’re considering this build to be a hybrid, the spells you’re using will almost always be supplementary.
Due to Gnoll’s skilling, our spells’ power is going to generally lag behind the branches we’re in. The one time I was able to get a level 8 spell castable I was wearing wiz and a total of +10 Int gear… and it wasn’t until XL26 that I had it online. Most runs you’ll be comfortably exercising the level 3 through 7 spells as they’re coming online from the beginning of Lair through the time you’re clearing Depths.
Even for dedicated casters, the level 5 and 6 spells can serviceably ascend a standard run, so taking some time to experiment and learn them when they’re essentially free will pay dividends down the road when you’re playing future builds. Remember, as long as you’re saving some for a Shackle, MP is the cheapest resource you have available.
In order to reduce the spell information overload and decision paralysis, I’ve listed the most effective spells from each level alphabetically below. Any no-brainer spells that should be picked up ASAP are listed at the top of the group since they’re significant force multipliers.
You’ll usually have plenty of spell points to go around, but if you start memorizing everything on this list you’ll run out fast. This build is about flexibility, so plenty of spells not on this list are serviceable. These are just the ones I found to work the best.
Outside of Irradiate and Yara’s, you should explicitly avoid anything that might hurt your homies like Arcjolt and the Blazeheart Golem. The other player local AoE spells end up doing sub par damage, but irradiate is one of the best ways for any character to shut down a threat that’s in your face. By virtue of the 1-tile hit box, you won’t be hurting as many of your homies as something like Starburst either.
Yara’s Violent Unraveling has a high synergistic potential with many other spells, and can make things like Mephitic Cloud viable into Zot. Used defensively, any damage that Yara’s might cause to your homies should be weighed against the potential costs of allowing a particular enemy to go buffed; a hasted rock troll can rip through your horde and zombies can’t see invisible.
It’s usually worthwhile to keep at least one summon spell on hand to help disengage in a worst case scenario, and mobility spells are safety nets that might never be used. Pick up something smite targetable too, sometimes not moving is the best option but your homies will be blocking any other way for you to do something meaningful in the fight. You might also want to consider saving an ?amnesia or two for a quick reshuffle for the orb run; mobility and strong summons become much more important then.
For a comprehensive index of all currently available spells, Onei’s spell tier list is an amazing resource. Keep in mind that some of the opinionated ratings are more appropriate to different builds, but it’s a great way to get a basic understanding of how a given spell might be leveraged.
Level 1
There isn’t much to say about the level 1 spells. By the time you can expect to have them available and castable they’ve largely fallen off in efficacy. You’ll have ample opportunities to learn these spells on any of the many characters that start with them.
- Apportation
- You don’t need it until you do. Properly leveraged it can decrease the cost of obtaining valuable consumables that would otherwise require a possibly costly fight.
- Foxfire
- Breaks LoS, can reliably hit invisible enemies, and makes steam. If they can’t get to an enemy they’ll build up a few turns before they start evaporating.
Level 2
Like the level 1 spells, these are mostly starting to scale out by the time they’re coming online around D:6.
- Grave Claw
- Smite targeted, can stay relevant through all 3 runes.
- Blink
- Its uncontrolled nature is offset by recall and the fact your homies are likely to be taking up more squares in the direction of the enemy.
- Call Imp
- The reach weapon means it can do plink damage even in pack fights, and it can take a hit enough to make space if you need to run.
- Construct Spike Launcher
- Reliable counter to early invisible enemies, falls off around S-Branch but can still see limited use.
- Jinxbite
- Falls off after Lair, but irresistible damage and drain make short work of even highly armoured and evasive enemies. Can be triggered by damaging throwing or ranged weapons.
- Lesser Beckoning
- Helps reduce fight and noise sprawl, serviceable through Zot.
Level 3
You’ll start to see spells that stay relevant through most of a standard game. These are all spells worth learning and experimenting since they’re generally quite cheap and accessible to most future builds you’ll play. You’ll be reliably casting these about the time you’re ready to start Lair.
- Mephitic Cloud
- Especially if you have rPois, this is essentially free kills on 50% of the game. The only drawback is noise but your horde can often outgrow the influx of soon to be confused enemies.
- Dazzling Flash
- Checks against HD instead of willpower. Your homies are immune to the effects, so it’s just straight debuff potential against the bad guys.
- Frozen Ramparts
- This is an effective spell that can scale into Zot, but using it (and Ozo’s Armour) will generally necessitate a bit more micro management of your horde to effectively capitalize on their benefits. It’s a play style deviation that will probably be noticeable from runs not leaning on these spells.
- Fugue of the Fallen
- Especially if you’re swinging at 0.6 or less an extra 3-7 slay is a lot of damage. Your homies’ kills help crank it up to full as well.
- Ozocubu's Armour
- An extra 2-11AC can stretch your HP and expensive resources; especially useful when you’re corridor soloing to build your pack. The mobility restrictions can be a liability as the fights grow larger. Since we’re generally in ring mail or heavier it’s best used in conjunction with other non-mobility spells.
- Passwall
- You have enough stealth to reliably sleep stab many enemies. Since you’ll usually have a meat shield, the delayed merging isn’t as much of a liability as for other characters. Recall as soon as you’re on the other side of the wall to preserve your precious crew.
- Summon Ice Beast
- Can usually tank a hit or two to make an escape. Ice attacks can slow about half the enemies in Lair.
- Swiftness
- Use it to make space and reset a fight. Be sure to regularly recall your homies so they aren’t slaughtered in an impotent off screen rear guard.
- Tukima's Dance
- Assuming you can affect them (and worth a ?vulnerability) the only way to guarantee a distortion wielding enemy can’t send you to the Abyss. Also useful against axe wielders and can stay relevant until Zot. Doesn’t work great in Snake.
- Vampiric Draining
- Normally a fairly inefficient damage to HP trade, but it can make sense while your homies beat on an enemy.
Level 4
Once we’re into level 4 spells we begin to see spells that can shape entire character strategies. Most spells at this level are fairly MP efficient, so they should be one of the first things you consider when running through options in the middle of a fight. You can expect to have these available by the time you’re finishing Lair.
- Olgreb's Toxic Radiance
- Free damage to 50% of the game and stays relevant into Zot. If you’re lucky enough to roll this and Ignite Poison you’ll have more than enough homies on hand to deal with the few enemies that don’t internally combust in 3 or 4 turns.
- Cigotuvi's Putrefaction
- Causes a large swath of miasma that your homies are immune to, but it has a devastating effect on all living enemies caught within the effects. Strong through Zot, and this build is a perfect time to practice this unique spell’s application.
- Airstrike
- Mainly good as a full screen smite spell. Your reliance on allies means it’s often doing less than optimal damage, but for our purposes a generally good trade of MP for damage.
- Anguish
- Best used against large groups since it can take a couple recasts to apply to any given monster. Since your homies’ defenses generally suck, the bad guys will at least be taking some extra HP loss for their trouble.
- Cause Fear
- This is not a panic button; ?fear is the panic button. Cast this 1/3 to 2/3 into a fight to help reset the battlefield. Combine with ?poison and recall for best effect.
- Dispel Undead
- The number one counter to 75% of the enemies you’ll face that Yred can’t help you out with directly. It’s worth memorizing just to deal with the high level undead you’ll face in Vault, Depths, and Zot. Mandatory if you attempt Crypt.
- Ignite Poison
- Really only useful for us if we have Olgreb’s; combining with Mephitic or darts is hampered by our reliance on allies.
- Martyr's Knell
- A great way to extend the lives of your homies.
- Summon Seismosaurus Egg
- Your homies help give time and space for you to hatch the egg while the seismosaurus itself is able to attack past your horde.
Level 5
We begin hitting spells that outright shut down large portions of the game, thus allowing our growing horde to be reserved for the hapless foe whose own rHubris fails. From here, spells become a bit more costly both MP and spell slot wise so experimentation should be carefully considered. These are likely to start coming online about the time you’re finishing Orc.
- Borgnjor's Vile Clutch
- A force multiplier that any caster should flex into. It can be used offensively, defensively, and supplementally to shape fights, and it can carry most fights in a 3 rune game prior to Zot.
- Summon Mana Viper
- In addition to being the best bang for your buck summons, they’re fast enough to beat your homies to the fight ensuring you’re directly exchanging MP for damage instead of hoping a sluggard can join the fight before a few of your horde fall in battle. If no other options are available, Mana Vipers and !might/!haste can prevail against Orbs of Fire.
- Yara's Violent Unravelling
- Even with it hurting your homies, it’s worth using frequently.
- Alistair's Intoxication
- Best used on full screen, but has a surprisingly high chance to affect human intelligence enemies you wouldn’t think were susceptible. It does fall off in Zot, and I otherwise never find much use for it due to the Vertigo effect. Since your homies are immune to the effects, there really isn’t much drawback to standing in the back and popping this off.
- Irradiate
- Life saver when you need it.
- Lee's Rapid Deconstruction
- Counters some very specific enemies that are otherwise difficult to kill; usually worth the 5 spell points.
- Metabolic Englaciation
- Some of your gifted starting pack is susceptible, but it has an amazingly high success rate against everything that isn’t cold resistant. Worth the MP in damage reduction to your crew.
- Summon Forest
- Your homies will generally block the dryad from rushing in and immediately dying while pinning enemies in place to be eaten by trees. Be mindful of changing LoS and off screen damage.
Level 6
The blaster caster’s bread and butter, but not a whole lot to offer a hybrid. These spells are expensive but effective when properly employed. You can start considering them about the time you’re hitting Vault.
- Bombard
- The only direct damage spell that will be relevant when it’s available and can scale through Zot. One of the available counters to Orbs of Fire.
- Forge Phalanx Beetle
- Free AC without the game play changing requirements of Ozocubu’s Armour. Great for blocking LoS on a retreat.
- Fortress Blast
- It takes some practice and planning, but it won’t hit your homies. Since you’ll likely be in mid-weight armour the damage will be decent.
- Summon Cactus Giant
- Can pretty much solo a 3 rune game, takes some planning to get them in the fight before your homies start dying though
Level 7
There are some real game winners here. These are generally very cost effective spells that are worth the MP. Pay attention to the relative power and employment of these spells for future builds, level 7 is only about 14-16 skill levels which can be considered cheap for races with good aptitudes. These are the types of spells that can be flexed into to bring home a victory in an otherwise lackluster game.
- Haunt
- An effective counter to anything Yred can’t directly help out with in a 3 rune game including Orbs of Fire.
- Hellfire Mortar
- The only thing in a 3 rune game it can’t handle are Orbs of Fire (and Vv). It also covers traps that might otherwise prevent a position from being defensible.
- Diamond Sawblades
- Needs to be deployed early and a bit micromanagy, but otherwise synergizes well with your horde.
- Enfeeble
- Counters most of the major threats in the game. Can be used to overcome OoF if nothing else is available.
- Manifold Assault
- By the time it;s online, double swords, evening stars, partisans, and broad axes should be reaching mindelay. Keep an eye on the MP reserves as this is a very magic hungry spell.
- Spellspark Servitor
- With Bombard its an effective counter to anything Yred can’t handle. Use with any L6+ spell for the orb run.
- Summon Hydra
- 2 hydra can kill almost anything or at least provide you time to duck and run. Sharing agro with your homies will offset their glass cannon nature.
Level 8
Don’t expect to see these unless RNG lands you wiz and a lot of Int.
- Borgnjor's Revivification
- A get out of jail free card, very useful during our final battles through Zot.
- Ignition
- Clears almost everything in the game except Orbs of Fire.
- Summon Horrible Things
- Best orb run spell for this build if you can get it under 15%. Can carry through Zot.
Adventuring
The principles of resource discipline and monster inspection should carry you through the majority of the game, so I’m only including some basic helpful notes for each branch.
You’ll be encountering a wide range of enemies that fit into some fairly generic archetypes. The power scaling may get steeper and the spells more sophisticated, but most of the tactics you’ll be learning in the first few levels should help you formulate initial plans for how to deal with new threats as they come up. Determining the archetype is as easy as inspecting the monster and reviewing their info. For the role play aware, consider the inspection screen some divine info from Yred…
- Popcorn
- Quokka. Just there to plink and distract, easily mowing through them will reduce your rHubris.
- High AC melee
- Orc Warriors. Evokables and throwing weapons usually reduce their threat.
- High EV melee
- Snakes. AoE to bypass evasion, binding/grasping to hold in place, or kite past your homies.
- High Damage melee
- Ogres. Keep them at bay or kite with evokables, throwing weapons, and homies.
- Ranged
- Centaur. Block LoS with homies/terrain, get them in close and surround them.
- Blaster Casters
- Bombardier Beetle. Poison from max range then use LoS to get close and finish them. Shake off any status effects they inflict.
- Smite Casters
- Orc Priests. Block LoS with terrain, focus fire, and counter battery with your own smite targetable attacks.
- Summoners
- Early Uniques, Kobold Demonologist. Ignore the summons and just kill the main dude.
- Packs
- Gnolls. Fight in a corridor or split.
- Boss Packs
- Kobold Brigands with a kobold pack. Budget a consumable or two, use positioning to reduce incoming damage and kill the boss as quickly as possible
- LoS Hexers
- Orc Wizards. Block LoS with homies, counter battery with smite targetable spells or torch charges.
- Yred Immune
- Wights. Lean on Gnoll adaptability and dungeon drops to fill in the gaps. Burning off lingering flaming wand charges or focusing fire are usually viable options in a pinch.
Once you’ve learned basic tactics against these archetypes, you’ll be 80% of the way there in knowing how to start engaging any given enemy.
There are certainly some niche enemies that don’t neatly fit into these categories, especially considering uniques or what is possible in extended, but considering them through the framework of your counters for these archetypes will still help you make effective decisions even if that means to run away. The tactics you’ll develop will generally be run specific, but there are some adaptations you’ll develop that fit your play style that you find to hold across most of your runs (e.g. maybe you discover an affinity for datura darts as your answer to everything in Orc). At the end of the day, you don’t need to worry about over optimizing here. 80% of the fights in any given run are going to be solved by about 5% of the tactics and a good portion of the rest can be handled by applying a little Yred love.
Branch Entries
Branch entries are a bit different from clearing normal levels. We don’t have any ability to peek and choose the best staircase, so we need to be prepared to put the pedal to the metal and start killing everything that shows up. Breaking branch entries this way will prepare you well for future builds that will be tackling things like Vaults:5 and eventually Hells. For now, we’ll just be practicing the same basic skills for clearing floor entries without the benefit of stair dancing.
First, you should always be prepared to ?teleport and regroup if the situation is going south. Since we’re not reliant on the staircase anyways, if you happen to find yourself in a nasty pregenerated entry vault the prudent move is to ?teleport away immediately and approach it from the safety of a cleared bastion.
Our branch entry bastion clearing should proceed in a spoked fashion, moving out a few tiles in each of the 8 directions as possible to clear out a little space. Be mindful of how moving creates blindspots where you might lose homies to offscreen damage and try to limit the number of tiles uncovered with any single movement. Once you have a full screen’s buffer in every possible direction, you can start to clear more specifically in a given direction or just autoexlpore the rest of the level.
Staircase Selection
Selecting the best staircase is a bit of a skill and art form. You want to be close enough to packs or major threats for your starting homies to clear without being surrounded.
Some knowledge of the branch denizens is helpful as well, since the walls that may feel safe at your back in early dungeon and Lair will soon be used against you by deep troll earth mages,
The presence of old school teleportation, shaft, and alarm traps might be beneficial, but be wary of fighting near dispersal, zot, or any of the recently added traps like devourer.
Branch End Vaults
At the end of each branch there is at least one end vault packed with baddies. For rune branches you might find no loot other than the rune and a gem, but for non-rune branches you can expect the vault to contain some equipment, gold, or spells. Monsters can pick up gear you haven’t yet seen, so be on your guard against human intelligence monsters that reside in the end vaults.
You’ll generally identify an end vault because the wall material will be different from the rest of the level, the area is segregated by a non-runed door or obvious hallway, or some combination of the three. They’re usually pretty hard to miss unless you’re mindlessly tabbing through the game at 2am.
End vaults should be handled with caution, and you can expect them to cost some consumables. Since there is usually a choke point leading in, it’s often a good idea to use ?noise to draw them out to an area where you can bring more homies to bear. This only works to a point on most vaults, and eventually you’ll need to dive in face first. It’s ok if your homies lag behind, you can always recall a swarm of them in front of you, but do your best to maintain control of the fights. Some end vaults are set up with lots of tight corners which are nice for strong melee builds but not so great for ally reliant characters; alternatively, the wide open vaults you might come across that challenge melee brutes will be prime territory for a Fathomless Shackle.
Branches
The souls listed for each branch are included because they’re more or less guaranteed to spawn in the branch and are serviceable enough to help clear a level or two. These aren’t exhaustive lists, and I’ve intentionally left out any uniques. I encourage you to explore and see how different bound monsters can be employed. I’ve also included some basic resists to shoot for; these are the bare minimum in order of importance. There are plenty of generic branch specific recommendations available on the wiki, learndb, Tavern, and reddit if you need to prepare further.
Listed resistances are the minimum generally considered necessary. In most cases, these can be achieved with swappers, but it’s ok to give up a couple points of total D if it means the basics are covered.
While also not exhaustive lists, I’ve also called out any major threats to be aware of. Especially if you’re playing trunk, these are subject to change, and there are certainly monsters that might be more threatening to certain builds. I’ve provided basic references to the archetypes, but many of the nastiest will fit into multiple categories (i.e. juggernaut are both high damage and high ac). In these cases I’ve classified them by the way it makes the most sense for me. Your playstyle may unfold differently, so use my archetypes as guides instead of hard and fast rules. Many fights will be overcome simply through the sheer mass of your horde, especially when you catch one of these major threats solo, and some runs you’ll overcome 90% of the enemies just spamming out cheesy spells like Olgreb’s Toxic Radiance, Ignite Poison, and Metabolic Englaciation.
References to willpower and HD hexes shouldn’t be taken explicitly as hex school spells. These include things like Mephitic Cloud, Alistair’s Intoxication, darts, wands, but I’ve kept these recommendations intentionally generic enough to adapt to whatever has dropped.
Lair
Yred’s powers should be enough to overcome any of the main threats you’ll be encountering in Lair. The outer walls often have single corridor recesses if you need to pull a pack and fight.
Enemies here are generally either vulnerable to poison or have poison attacks, and most have to close to melee range to attack you. This is a good place to spend any darts you’ve collected from your early dungeon levels.
While a torch charge and kiting a hydra past your homies works pretty well, make sure to check for any flaming bladed weapons before you enter ( flame && << long blade || axe >> ).
- Souls
- Manticore, Hydra, Snail
- Resists
- rPois, Will+
- Notable Threats
-
- High Damage Melee
- High EV Melee
-
- Black mamba
- Use will or HD hexes that aren’t poison based.
- High AC Melee
-
- Boulder beetle
- Use willpower hexes. Stack on the poison. Kite around your homies if it is not balled up, kite into your homies if it is.
- Ranged
-
- Catoblepas
- Stack on the poison, Hit with torch charges, damaging wands, or thrown weapons as it closes then pound on it with your homies in melee. Keep moving around the catoblepas as it tries to petrify you.
- Dragons
- Use willpower hexes. Blind with /light, hit with multiple torch charges or damaging wands. If you don’t have a pack to surround and melee down, it might be best to run.
- Packs
-
- Death yaks
- Hit packs with torch charges then move fights to corridors for one on ones. Curare and lay on the poison. Try to move up and preserve any death yak zombies you make.
Orc
Most of the enemies you’ll encounter in the Orcish Mines are susceptible to Yred’s powers, and even with sub par RNG we shouldn’t be too worried about wiping. There is a possibility of rolling a demonic Orc:2 vault, so be prepared for some kiting.
Since Orc:1 may be disconnected it’s worth checking the layout with ?revelation if you happen to have four or more; in a pinch your item detection might find places you can dig. If there is a down stair immediately visible it can sometimes make sense to dive straight to Orc:2 and reverse scout, but it’s not the end of the world if you short Yred a level. Orc is a great place to use up some !attraction and ?poison scrolls to supercharge a Fathomless Shackle or two.
Be careful around obsidian bats - charm or paralyze them before their hell hounds wipe your horde.
If you add the items you find in Orc:2 shops to your wish list, you can refine your search for floor trash on the current level to @!!gold.
- Souls
- High Priests, Sorcerers, Axe Warlords
- Resists
- Will+, rPois
- Notable Threats
-
- Summoners
-
- Orc high priest
- Use willpower hexes. Stack on the poison. Javelins, bolt evokables, torches, and smite targeted spells all make short work of them. Double down the firepower if they spawn Tier-3 Demons.
- Orc sorcerer
- Use will or HD hexes. Stack on the poison. Watch out for Tier-3 demons.
- Ranged
-
- Stone giant
- Use willpower hexes. Stack on the poison. Burn torch charges and evokables if necessary or just let your horde plink them down.
- Cyclops
- Use will or HD based hexes. Close to melee and surround with homies.
- Kobold blastminer
- Use will or HD based hexes. Stack on the poison and let your homies kill them.
- Boss Packs
-
- Obsidian bat
- Trap in a corridor or kite past your homies. Don’t let your homies engage directly since they’re easy to hit which causes the obsidian bat to spawn hell hounds and hell rats. Like any bat, move away to invite fewer attacks.
- High Damage Melee
-
- Iron trolls
- Stack on the poison. Hold or grasp in place. Make space with translocations or evokables, and let your homies kill them.
Late Dungeon
You’ll start to see normal monsters with the ability to banish you in the form of Occultists. They’re pretty fragile, so let your homies block LoS and take them out. You can expect to fight the same types and stronger versions of monsters you’ve encountered so far as well as some that you can expect to start seeing in the upcoming rune branches.
There are usually some uniques sprinkled through these levels that can help you clear the S-branches with ease.
- Souls
- Nothing really stands out here, keep your eyes out for anything listed in other branches.
- Resists
- Will+++, rPois
- Notable Threats
-
- Banishers
-
- Occultist
- Use willpower hexes. !Invis or otherwise block LoS. !Enlightenment or ring swap to get Will+++.
- Boss Packs
-
- Rakshasa
- Hit with torches, damaging evokables, and throwing weapons. Get in close enough to recall your horde in, but stay behind the front lines since Force Lance can slash your HP.
- Packs
-
- Yaktaur
- Use will or HD hexes. Pull back around corners, and try to reduce the number that have simultaneous shots on you.
- Meliai
- Use will or HD hexes. They also smite and are high EV. If hexes are unavailable, use or cast AoE with higher chances to cause damage or grasp in place to increase hit chance. (Holding does not increase hit chance, only grasping)
S-Branches
You’ll start to see some enemies here with some unique attacks; pay attention to your status fields and message log. You should expect to start having access to some level 5 spells around this point, and while Yred can carry through all four S-Branches with careful play it’s much more cost effective to leverage some of the level 4-6 spells that should be available to you. Your javelins should also be around 1.0 throw speed, so it can be worth throwing them or mindelay boomerangs if you see an opening.
If you’re feeling underpowered clearing out the first 3 levels of any S-Branch, save the rune levels for after you’ve gained some XP in Elf.
Swamp
Your homies and a polearm will help you stay dry if you haven’t found a decent source of flight yet, but expect to spend an !enlightenment or two for situations where you’re forced to fight a high threat monster in the water. The derived undead here are generally strong and resistant to most of the elemental attacks in this branch and the open layout benefits overwhelming your enemies with homies. Like Spider, if you’re seeing an undead end vault it might be worth saving the rune for later where you’re strong enough to deal with a zombie Learnie on your own.
- Souls
- Hydra, Red Frogs, Spriggan Druids, Spriggan Berserkers
- Resists
- rPois, rC+, rN+, Flight
- Notable Threats
-
- LoS Hexers
-
- Fenstrider witch
- Resistant to hexes, hit with smite targetable spells and polearms. Let your undead homies deflect the agonizing touch mini-torment and paralysis effects.
- Summoners
-
- Spriggan berserker
- Resistant to hexes, take them out before they start summoning berserked friends with undodgeable AoE attacks, or use grasping attacks and some javelins.
- Spriggan druid
- Resistant to hexes, your homies aren’t smart enough to avoid the trees the druids enrage, so try to take them out quickly. Since animal intelligence monsters get healed and mighted when a druid dies, it might be prudent to read ?teleport.
- Ranged
-
- Death drake
- Stay at the far edge of the screen and let your homies kill.
- Thorn hunter
- Use bolt or smite attacks to hit them from beyond their briar patches.
- Boss Packs
-
- Shambling mangrove
- Focus fire on the mangrove, but be prepared to refocus on the hornets they will spawn at low health. Immediately shake off any roots as the grasping effect gives the same to hit bonus to enemies we rely on when we root them.
Spider
Tight corridors and a lot of blind spots means you’re going to be tanking a lot of fights and losing a decent chunk of your homies off screen. It’s often worth 6-8 turns relocating to a larger room even with the fast spiders getting some attacks of opportunity on you - your undead are moderately quick here too.
Without SInv, you’ll know there’s a ghost moth by messages and a lack of MP; you can usually find the empty space in your pack then pound it down with a !might if your bound soul and spectral ghosts aren’t killing it for you. Fathomless Shackles will feel a little weaker than it was in Orc:2, but it’s still strong enough to help you clear out the non-undead end vaults you find here. If you see a lot of zombie and spectral ghosts guarding the rune vault it’s probably best to get the rune after you’ve cleared Vaults and Depth.
- Souls
- Culicivora, Snail, Broodmother
- Resists
- rPois, rElec, SInv
- Notable Threats
-
- Blaster Caster
-
- Orb spider
- Use willpower hexes, and stack poison. Let your homies tank any orb they throw your way.
- Sun moth
- Use will or HD hexes, and stack poison. Be wary of their sticky flame, stay mobile while they’re on the screen.
- Boss Packs
-
- Pharaoh ant
- Unlike other bosses, try to keep this one at a distance and kill the pack first.
- High AC Melee
-
- Emperor scorpion
- Use non-poison based willpower hexes. Recall your homies to surround and use movement to spread damage.
- High EV Melee
-
- Death scarab
- Try to hit them with undodgeable AoE attacks or hold them in place with grasp.
- Ghost moth
- Equip SInv or quaff !invis. If you can’t see it, use damaging bolt or AoE effects, or summon/forge an ally that can see invisible enemies.
- Spark wasp
- Use willpower hexes. Stack on the poison. Swap to a staff of air if you haven’t found a better source of rElec.
- High Damage Melee
-
- Radroach
- Use willpower hexes. Hold or grasp them in place to keep them from getting adjacent, and hit them from behind a wall of homies with a polearm.
- Summoner
-
- Broodmother
- Use willpower hexes, and stack poison. Target them early in the fight before they start summoning lots of friends and be wary of their damaging bite.
Shoals
Like Swamp, a polearm and some utility spells go a long way in mitigating the need for flight so make sure your resists are filled out first. Due to the prevalence of ranged enemies, be particularly vigilant to log messages indicating one of your guys is being hit from off screen. By this point you should have access to some useful screen wide AoE spells that can help you with the generally non-resistant monsters you’ll be fighting. Look for things like Alistair’s Intoxication, Olgreb’s Toxic Radiance (with or without Ignite Poison), Anguish, and Metabolic Englaciation (also extremely useful in Snake).
Darts and other throwing weapons can be useful here, and if you use (period) . to conclude the throw instead of a second f the thrown weapon will stop on the enemy’s tile instead of possibly going to the end of the screen and falling into deep water. If you come across an enemy carrying an item you want, make sure you don’t kill them over deep water or you’ll lose access to it.
Most enemies here are susceptible to a good shackle, so while there isn’t a huge fear of wiping, keep in mind that having a lot of ranged users on screen at once can spike your incoming damage very quickly. There can be some tough fights that ?teleport and recall can reset for you.
- Souls
- Alligator snapping turtles, Kraken
- Resists
- Will++, rPois, rElec, Flight, repulsion
- Notable Threats
-
- Ranged
-
- Merfolk javelineer
- Use willpower hexes. Blind or corrode with wands. Reposition off screen especially if more than one or supported by other ranged packs. The javelins will decimate both your pack and your health bar.
- Alligator snapping turtle
- Use willpower hexes. Stack on the poison. Kite past your homies.
- Summoners
-
- Merfolk avatar
- Retreat to draw them into your pack of homies, let her get surrounded, then close in for the kill. May require an !enlightenment if she retreats too far into deep water.
- High Damage Melee
-
- Kraken
- Use willpower hexes. Stack on the poison. Hit the head or groups of tentacles with AoE or bolt attacks.
Snake
Your homies are as strong and quick as the nagas and snakes they come from, and the disconnected rooms prevalent in Snake Pit work nicely for calling in a pack of homies on top of an unsuspecting room of sleeping nagas.
Watch out for Guardian Serpent’s encirclement attack, it doesn’t require LoS and our Gnolls are a bit underpowered to be tanking 6 or 7 angry sneks. If blink is available to memorize it’s a much cheaper option than a more costly ?fear or ?blink.
Kill the salamander casters as quickly as possible as their fire attacks can cut your crew in half in the blink of an eye.
As with Shoals, you’ll likely experience some attrition from off screen attacks.
- Souls
- Nagaraja, Sharpshooter w/ Polearm
- Resists
- rPois, Will++, rF+, rElec
- Notable Threats
-
- High Damage Melee
-
- Nagaraja
- Attempt to debuff with wands and focus fire.
- Ranged
-
- Shock serpent
- Use willpower hexes. Stack on the poison. Try to let your enemies kill them so you don’t get shocked in return.
- Boss Packs
-
- Guardian serpent
- Focus fire and hit with AoE or bolts. It can be worth throwing a javelin through a homie if you need to take out a guardian serpent.
- Blaster Casters
-
- Salamander tyrant
- Use willpower hexes. Stack on the poison. Like guardian serpents, enough of a threat to sacrifice a friend.
Elf
If you can’t get to Will+++ with an ?enlightenment then it’s best to avoid the risks of being sent to the Abyss and just bypass the Elven Halls if you want to play it fully safe and go for a win. You’ll also want at least a swappable source of SInv in order to eliminate the pesky knights that like to fade away at the start of every fight. Lastly, if you’re heavily reliant on swappers for resists it might be prudent to first tackle Vaults 1-4 which offers fewer fights where overlapping resists are needed.
Generally, you should be pretty well equipped by this point to handle this branch, and Shackles still makes this branch a generally safe bet (outside of the elf necromancers reviving everyone). It’s best to skip Hall of Blades for now; you can come back after Depths to deck out whatever demon trident you hopefully found. If you find yourself teleported inside, just ?teleport your way back out.
Even with willpower giving you practical immunity to the banish spell, you’re still likely to encounter a few weapons of distortion. The rewards in both XP and gear can still be worth it, so use every tool at your disposal to keep them at bay. Warping or root wands, Bognjor’s Vile Clutch, and nets are the most straightforward, but there are a number of translocation and ally based spells that can perform this role serviceably.
All that being said, play this branch carefully and use wands and cheaper consumables to help mitigate the more serious threats. Curare, acid, light, and ?poison can all help reduce the threat from severe to manageable.
Try to eliminate enemy necromancers first, but be aware that the high priests have smite targetable damnation. This is one of the last branches where reflection is going to make a meaningful impact on the fight, and if you can manage it, repulsion makes you almost bulletproof.
- Souls
- Yellow Elves
- Resists
- Will+++, rF+/rC+, rElec, rPois, SInv, repulsion
- Notable Threats
-
- High Damage Melee
-
- Deep elf blademaster
- Blind, corrode, or grasp in place. Stack on the poison. Recall your pack around them and spread damage.
- Dancing weapons
- Grasp or hold in place. Poke with a polearm from behind the front ranks. !Invis if you’re forced to tank a swarm solo.
- Smiters
-
- Deep elf high priest
- Check will and HD hex success. Stack on the poison. Use bolts or javelins to finish them off quickly.
- Boss Packs
-
- Deep elf death mage
- High priority targets. Blind, stack on the poison and kill them quickly. Ignore their souls and just finish them off.
- Banishers
-
- Deep elf sorcerer
- Will+++ or fight from behind the front ranks. Hit them with smite targetables or Torch Charges.
- Deep elf demonologist
- Same as Sorcerers, but check will and HD hex success.
- Summoners
-
- Deep elf elementalist
- Try to eliminate them before they spawn hoarfrost cannons behind you. Focus fire on the elementalist or reposition and recall your forces if necessary.
Elf:3
With the S-Branches, we’ve seen a few vaults, but nothing really prepares you for hitting the Elf:3 vault for the first time. While you can expect the Elf:3 vault to cost a half dozen or more potions and scrolls, the payback in gear, consumables, and spells should more than compensate for the loss.
Start Elf:3 by spending a ?revelation to identify the location of the final vault on the map. Look for an area that does not appear to be randomly generated with one to three single or double wide corridors leading to the center with a few smaller treasure rooms. Using the level examine (X) to set exclusions (e) at the mouth of each vault entry, then clear around the rest of the level without lighting your torch. If you’re marked, immediately make your way to the nearest up stair; if you’re teleported into the vault room, light your torch, Shackle up, quaff !attraction, and start buffing. Be prepared to ?teleport and recall as you can be quickly surrounded by undead you’re unable to drain.
Assuming everything goes to plan, you should have a nice fully cleared out level to ?teleport to in case things get overwhelming. What you don’t want to do is immediately rush into the vault since you don’t know the exact makeup of the elven forces guarding the treasure. Using derived or summoned homies as blockers, peek into the vault then kite out the first few elves you see. Ideally, we’ll be pulling 2-3 at a time with a slow trickle coming in from offscreen… this is generally manageable without active god powers and builds up a solid pack of allies. Be on guard for demons and anything that can hit you with smite or smite targeted hell effects (damnation, hellfire), you might need to start chucking silver javelins even if it means going through the back of a zombie’s skull.
Most of the time, you’ll start with a small pack of enemies that quickly turns into a flood as the rest of the elven guard rush to their friends’ aid. Much like their smellier cousins, elves are quite susceptible to the effects of Shackles and !attraction with a nice side effect from the attraction blocking line of sight from enemies that might otherwise pile on damage we can’t return. This is one of the few times in the game where losing LoS is actually a good thing; our homies are extras in this fight and you can’t really count on them staying around for long so losing them to offscreen baddies isn’t the big loss it is elsewhere.
With the first main group of defenders out of the way, you can still expect pockets of heavy resistance as you move through the rest of the vault, so be prepared to fall back to a cleared bastion and duke it out with another strong pack or two. It’s not unusual to need two or even three Shackles to safely make your way through Elf. You can also expect one or two defenders in each of the treasure rooms that may include banishers; it’s wise to tell your homies to precede you into the rooms.
Once you’ve killed all the defenders, take stock of the first of your winnings. You’ll likely find some missing resists, much needed spells to fill out weaknesses, and even a few powerful artefacts to round out an already strong character.
3rd Rune
You should have access to some pretty powerful and fight changing spells by this point which will help since Yred’s direct assistance will start to fall off. Our homies will be generally underpowered for the rest of the game and you can expect them to become more of a living meat shield than a horde of beings each their own.
While a lot of popcorn fights will be against living beings, some of the largest threats will be immune to the draining effects of shackles.
We’re leaning back on the Gnoll’s natural skill affinity which was up until this point a bit behind the power curve. Since our skills are in the middle teens, we’re at or near mindelay on our weapon, able to wield a kite shield without killing our spell rate, and able to cast level five and soon to be six spells. You should be looking at over 50 and hopefully closer to 60 total D while having a few basics resists covered without needing to swap every fight.
Vaults 1-4
You’ll be fighting in a mixture of room types and large hallways. Take the time to steer the fights to the more open areas or you’ll quickly find yourself fighting solo.
Crystal golem packs are manageable with an overwhelming horde of homies, but I’ll sometimes memorize Lee’s Rapid Deconstruction just to take them (and later cursed skulls) out.
- Souls
- Ironbound Thunderhulk, Ironbound Frostheart
- Resists
- rC+, rElec, Will+++, SInv
- Notable Threats
-
- High Damage Melee
-
- Crystal guardian
- Memorize LRD just for these guys. If they make you fragile, run. Fragiled crystal shots can quickly end your run.
- LoS Hexers
-
- Vault sentinel
- Use will or HD hexes. Stack on the poison. Block LoS with homies and poke from the back ranks.
- Summoners
-
- Boggart
- Use will or HD hexes. Hit with bolt or AoE early before they spawn a swarm of hard hitting bad guys. They travel in packs!
- Boss Packs
-
- Vault warden
- Let them lock their friends out then recall in your homies.
- Ironbound convoker
- Use will or HD hexes. Stack on the poison. If they start recalling, attempt to immediately confuse, silence, dispel or otherwise disable their ability to finish the recall.
- Smiters
-
- Ironbound thunderhulk
- Use willpower hexes. Stack on the poison. Swap to rElec even if it’s just a staff of air.
- Ironbound frostheart
- Use willpower hexes, check HD hexes. Step away from the wall and their threat level goes way down.
- Ranged
- Yaktaur captains
- Use willpower hexes. Eliminate them early as their bolts can travel through your homies to take off huge chunks of HP.
Crypt
Unless you’re at rN+++ with SInv, have Dispel Undead, and a strong summons (mana viper, cactus, or similar) don’t attempt this branch. Yred does practically nothing for you and you’re unlikely to have a bunch of spells memorized to blaster cast your way through. The loot is generally a bit mediocre, but you do have some opportunities to pick up more evokables, spell books, and artefacts. Outside of the specific threat of almost everything being immune to your God powers, Crypt is usually a bit of a pushover and it’s probably worth dipping your feet in to at least get a feel for the branch. If it looks like this branch is going to cost you more than one !heal and one ?blink, it might not be worth it to finish even if it means leaving Yred a little unsatisfied.
- Souls
- Nothing, it’s almost all undead
- Resists
- rN+++, will+++, rPois, SInv, rC+, rElec
- Notable Threats
-
- Summoners
-
- Dread lich
- Will+++ and dispel undead.
- Curse skull
- rN+++ and dispel undead.
- Blaster Caster
-
- Ancient lich
- Approach guarded by homies, dispel undead.
- High AC Melee
-
- Bone dragon
- Dispel undead; will probably take your entire mana bar.
Depths
Depths is a lot of big fights with a lot of tough monsters and a lot of tough homies that still die quickly.
There’s quite a few mini vaults that have blind spots and aren’t always convenient to be pulled from; expect to be regularly leading the way into fights with packs of monsters. If you see space, try to fill it by recalling a member of your crew from off screen.
By this point you should have at least one strong summons, a full screen debuff, a homie friendly AoE, and either BVC or Bombard. The last two are more nice to haves than requirements.
Expect to reset a few fights with possibly multiple ?teleports and other consumables.
- Souls
- Brain, Rakshasa
- Resists
- will++, rPois, rElec, rC+, rF+, SInv
- Notable Threats
-
- Blaster Casters
-
- Walking tomes
- Pull to a corner and avoid overly open areas; especially the holy and crystal version will drop your HP bar fast!
- Wyrmhole
- Focus fire and try to stay outside the range of the bolt spell. You won’t have the pack of homies to support random teleports into even more groups of Depths level enemies. Quaff !teleport if you need to erase the effects.
- Ranged
-
- Dragons
- Pull to corners and tank in melee. High level debuffs may stick, so check your success rates. Try to line them up diagonally so they aren’t breathing bolts through your pack.
- High Damage Melee
-
- Juggernaut
- Avoid standing next to this. Surprising Crocodile can be great for this. Blind or corrode with wands.
- Packs
-
- Hell knights
- Use will or HD hexes. Stack on the poison. Recall your homies into the middle of their pack and try to avoid letting their bolts hit too many of your crew.
- Caustic shrike
- Check success of willpower hexes. Fathomless Shackles is warranted just for these packs alone, but DO NOT quaff !attraction. Instead, kite them across the area of effect.
- Banishers
-
- Occultists
- Use willpower or HD hexes. Swap or quaff !enlightenment to will++. If you have a large pack, just hide behind them and focus fire.
Slime
Contrary to popular recommendations, we’re going to be clearing out as much of Slime as we can. Since we’re likely missing some timed portals, Crypt, and Vault:5, the extra experience will help ensure we’re strong enough for Zot.
Like Orc:1, most of these levels are likely to be disconnected. Sometimes you can see across gaps in the walls to places auto-explore can’t reach, but since there isn’t floor trash you won’t be able to detect other sections like in Orc. Peak down on as many stairs as you can and just do your best to clear as much space as possible.
You should quickly have a giant pack of homies on most floors, so you’re effectively immune to the malmutation from shining eyes.
In a pinch, everything here is susceptible to Fathomless Shackles, but save some piety for your fight with TRJ.
- Souls
- Dissolution (a unique, but the normal ones aren’t worth binding)
- Resists
- will++, rCorr, rC+
- Notable Threats
-
- High Damage Melee
-
- Rockslime
- LRD makes short work of them if they’re at range; otherwise, overwhelm with homies and try to spread damage.
- Ranged
-
- Acid blob
- rCorr or rMsl, overwhelm with homies.
- LoS Hexers
-
- Shining eye
- Hide behind your homies, they’re fragile so will probably die on their own but focus fire if necessary.
- Golden eye
- Swap or quaff !enlightenment to get will+++, swat like flies after that.
TRJ
For Slime:5 itself, first carefully clear as much area as you can to give yourself a safe landing spot in case you need to ?teleport out of the fight. If you stumble across The Royal Jelly before you’re ready, it’s better to ?teleport away and recall so you can ensure your safety.
I like to try to lead the TRJ fight with a silver javelin from 3 or 4 tiles away, light the torch, then start spamming TRJ with torch charges until it’s dead.
Either right before or right after it dies, trigger a Fathomless Shackle which combined with the homies you amassed from clearing should eliminate most of TRJ’s spawn. The shackles give you a few more turns for error, but if the fight looks like it’s going south just ?teleport out and reset the fight.
Vaults:5
Success on Vault:5 will be very RNG dependent for this build. Sometimes you’re going to be stacked and clear it with ease, other times it’s an immediate wipe.
It’s too much of a gamble overall for me to recommend or include it in the guide.
If you think your Gnoll is strong enough or you’re fine risking a wipe or consumables for the sake of learning then give it a shot. Neither the gear nor the loot is required to ascend, and we should already have our 3 runes. Recommending a strategy is too dependent on how your build has progressed, so if you intend to undertake Vault:5 I encourage you to seek out one of the many forum or reddit posts that have more build specific strategies. Due to the prevalence of high powered undead and likelihood of dark elf necromancers, Fathomless Shackles might not out heal the immense potential incoming damage.
Abyss
Avoid this at all costs. Yred is very ineffective in Abyss and any trips here are likely to cost more and higher value consumables than dealing with any threat that can send you there before it’s able to even have a chance at banishing you.
End Game
For Zot and the endgame we’re going to be heavily reliant on the Gnoll’s ability to use whatever the dungeon has provided.
By this point, the dungeon has thrown all the attack patterns and tactics it has at you, so you should have some answers for blocking LoS, shutting down hexers, getting out from being blink surrounded, and generally have any weaknesses covered. Our Gnoll should be over 60 total D, hitting reasonably hard and fast with a highly enchanted one-hander, casting level 6 or 7 spells, and have most of their resists covered without needing any swaps.
The enemies we’ll be facing are largely resistant to poison and negative attacks, and the freezing brand is going to be the least resisted ego you can get on a weapon. Worst case, make sure you have something solid to buff up and smack down an Orb of Fire with.
Prior to setting foot in Zot, it’s a good idea to gather up any consumables you may not have collected as you explored the dungeon.
In order to do this efficiently, I’ll first craft a search pattern to find all the scroll and potions that I’m not carrying excluding a couple things I know I won’t need: <<potion || scroll>> && !!<<carried || ligni || attract || immo || enchant || brand >>.
I’ll skim the list and add anything I see that I don’t want to go pickup to the list of exclusions (after a new || and before the final >>) until the search results show only things I actually want. From there I can just Ctrl+F and hit the first (or second if a shop shows up in the list) result repeatedly until I’ve collected everything.
This whole exercise should only take a minute or two, and it’s probably worth picking up all the !mutation that have been laying around since you’re likely to be getting some gnarly mutations from Orbs of Fire soon.
Zot
I normally recommend using a ?revelation as soon as you enter Zot:1 and save one for Zot:5, revealing all the other levels but leaving a spare ?revelation in case you hit a shaft. Since Yred will still be protecting us from shafts, we’re pretty free to use up the rest of the ?revelations on the intervening levels.
The sheer damage output and frequency of multi-hit attacks means that your pack of homies is now going to be recycling almost as quickly as Qazlal’s clouds; don’t get attached to any of them in Zot, even the occasional bound soul is going to die fast. The damage potential of torch charges falls off a bit here, so use them to buff some of the already strong zombies you have fighting on your side if you can’t catch 4 or more enemies in the blast.
- Souls
- Bound monsters don’t last long here, try the stronger dragons if you’re lacking a permanent friend
- Resists
- rF++, rPois, will++, rElec, rC+, rN+, SInv
- Notable Threats
-
- Curse toe
- Unless you have dispel undead there aren’t really good counters, you just gotta pop consumables and tank them down.
- Orb of fire
- rF++ or better and tank, Mana Viper, Servitor/Enfeeble/Haunt are good counters and should be castable.
- Electric golem
- rElec and tank, they don’t hurt your homies too much but soak a lot of damage.
Zot:5
We’re going to save lighting the torch as long as we can; there’s a possibility of being teleported directly into the lungs and Yred’s initial crew will be full of some very strong dudes to help you out.
Orb guardian zombies move quickly and hit hard, but they’re still going to be little smears for Orbs of Fire. Holding off on lighting our torch means we should also have the option to kite to the stairs for a little stair dancing.
It’s also a good idea to stash some homies safely away to help you reset and escape a fight. They won’t last long against an Orb of Fire, but they might get a few hits in or block a malmutate.
Having some spells to help deal with orbs of fire is pretty critical here as you’ll regularly encounter around half a dozen of them per run. With a few pips of rF you can comfortably buff and beat them down if worst comes to worst but try to peel and solo them if that’s the case. Expect to wipe the first two or three times you attempt Zot:5; it’s the closest thing there is to a boss fight and even top tier players can find themselves in a pickle once in a while.
Orb Run
The orb run is an entirely different play style from the rest of the game.
Your only goal is to get to the next staircase and ascend; don’t bother fighting unless you have to. Having some summons that can take a hit or distract enemies so you can keep moving will save your HP and consumables for when you really need them.
It’s generally worthwhile to save an ?amnesia or two in order to reshuffle your spells if you don’t already have things that are good for the orb run.
Spells you should consider are strong summons and mobility spells: cactus, haunt, passwall, blink, etc. ?Blink and !haste will be the most valuable consumables you have available, and try to save one of each for D:1.
Aside from pan lords, the demonic baddies that spawn can mostly be bound; having a semi-permanent ally can help save consumables to get you to the next staircase. It’s a good habit to immediately inspect any pan lords you come across with an eye towards blinking spells, silence, banishment/distortion, and level 9 spells.
Unless you found an early altar, you can still light your torch on the topmost dungeon levels.
- Souls
- Executioner
Portals
Our build doesn’t really lend itself to consistently visiting timed portals, but you’ll have some opportunities to explore a few of them over the course of multiple runs. You’re probably going to have to deal with some FOMO here, but portals can be valuable training tools due to their regularity. Especially the early Sewer and Ossuary portals can be cleared by most characters if you maintain good resource discipline; you'll often be rewarded with even more consumables than you spent there.
In general, you’ll need to decide immediately if you want to attempt the portal or not; a large stack of ?revelation can make this decision easier. You’re also generally safe to wait on the staircases to see if the portal is near any of them, if not it’s probably best to just skip it and active your torch.
Some levels are laid out in a way that you can still clear most of the level with the torch lit, hit the portal, then finish up any lingering enemies, but it’s more a happy accident than something you should expect to be able to make happen.
If you do decide you want to make a run for the portal, be aware that you won’t have that critical shaft protection we’ve been leaning on the whole game. The following recommendations apply to the Git Gud Gnoll, other builds may fair better or worse in confronting these.
- Sewer
- Early Gnoll can clear. Watch out for brain worms, crocodiles, and big kobolds with curare darts.
- Ossuary
- Early Gnoll can clear. Some layouts are trapped, so be prepared to make a break for the exit.
- Bailey
- Yred makes these pretty easy if you have at least Hurl Torch online; otherwise, it's probably best to skip these.
- Gauntlet
- Go in and check paths, initial allies can sometimes clear, fully omniscient threat assessment with 0 threat.
- Volcano
- Avoid them, too much threat to your homies leaving you unprotected.
- Ice Cave
- Yes, only if living or slime (slime needs rC+). Be careful of out of depth monster in the end vaults, but sometimes there is interim stashes before you reach the main treasure.
- Desolation
- Avoid them, too much LoS goofiness and overwhelming non-living enemies.
- Wizlabs
- Avoid them unless you're feeling overpowered already. These are worth researching in the wiki and all are safe to immediately exit before you get confronted with enemies.
- Trove
- Probably not worth the cost, but you’re going to do it anyway.
- Ziggurat
- Skip it. Yred lets you light the torch and get full charges on every level, but they don’t help you on the levels that are going to give you problems.
Things to Avoid
Outside of the aforementioned branches and portals, there’s a few monsters, bound souls, and items that you should just avoid with this build.
- Vv
- Pretty much immune to everything including getting beat on; unbindable. Will wipe your horde using you as the toilet paper.
- Mennas
- An amazing soul to bind for extended, but too risky for a standard game.
- Singing Sword
- Unfortunately hits homies
- Things that aren’t worth binding
-
- Merfolk avatar
- They don’t spawn the little ghost things that wreck you so badly.
- TRJ
- Just not worth it.
- Jorgrun
- Diggy diggy hole.
- Mennas
- Unless you really like being silenced.
- Killer Klown
- They blink off screen and are neurotic as homies.
Where to Next
Congratulations! It may take a few dozen runs, but you’ve successfully ascended the Git Gud Gnoll and now you’re ready to tackle the next challenge. Maybe, like me, you came into this game with the dream of ascending your favorite species, in which case take your new found game fundamentals and start collecting runes!
Other players might still want a bit more direction and that’s cool too. You might consider running through one of the other recent guides, joining the Crawl Cosplay Academy, or just going after some general player achievements.
Other Guides
One of the fantastic parts of this community is the regularly published fan guides. I’ve either personally played or read each of these guides multiple times in improving my own skills.
Repo Troll Guide, TrFi^Wu Jian [Beginner] (0.32)
A fun, technical, and powerful build. Claw your way through hordes of enemies using (imo) the second funnest god power in the game: Heavenly Storm. It’s an experience every Crawler should have at least once.
Onei's Velvet-Pawed Path to Immortality [Advanced] (0.32)
A different kind of ally build. The monster and ally pathing knowledge you’ve learned will help ensure each of your kitty’s lives is extended as long as possible. A great follow up to the Git Good Gnoll if you aren’t burnt out on allies yet.
H's Minotaur Fighter Guide [Beginner] (0.31)
While generally focused on very fresh players (and you may have even tried this one first), H’s MiFi guide can help you cleanse your palette on a fun O-tabber. Get yourself in sticky situations and use your new found resource knowledge to sort it out as cheaply as possible.
How to win more at crawl: a guide
A concise reddit guide from roughly 0.31. This quick read is chock full of tips, tricks, and hard won knowledge. Consider it the quick refresher you read every few ascensions to keep your skills sharp.
Dextopode
A circa 0.30 guide that can still be used as the framework for many dex based melee builds, and it still holds its own in the current 0.33a trunk for podes.
Crawl Cosplay Academy
The Crawl Cosplay Academy is an entry level trainer covering 4 archetypes with 12 different builds each based on a unique from the game. Players will be able to take the foundational skills from the Git Gud Gnoll and immediately apply them to well thought out trainer builds. You can stop there, or move on to the full weekly Crawl Cosplay Challenges - challenging builds based on the uniques from the game.
DCSS Stats - Community Achievements
Stats page Challenge yourself to ascend every background or race, or just earn one of hundreds of unique skill based titles. Draconian fans should check out the Tiamat achievement!
Closing
Thank you, crawler, for taking the time to read and hopefully follow my guide. I hope you enjoyed playing the build and learning the game as much as I enjoyed writing this guide. For any feedback please refer to the official Git Guide Gnoll Guide thread on Tavern 2.0
